
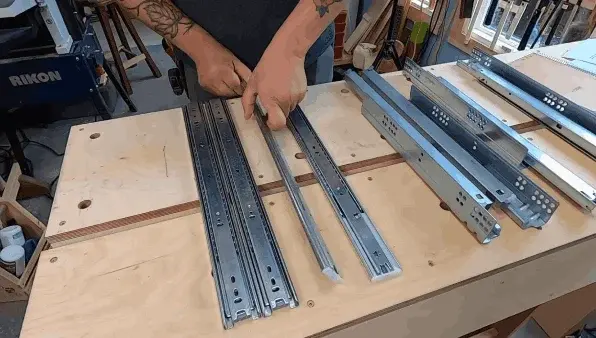
Kitchen drawer bottom slides are commonly used in formal-themed rooms and consist of two metal cabinet slides on both sides under the drawer.
Over time these metal slides can accumulate dirt particles in the tracks and cause the drawer to stick or become jammed. Consequently, you need to remove these slides to do maintenance.
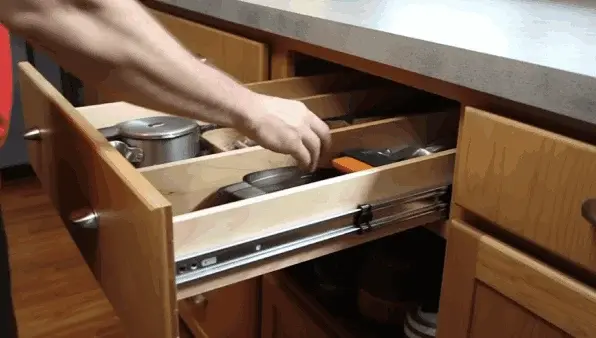
Removing these kitchen drawers with bottom slides is a relatively straightforward process. To safely remove bottom-slide kitchen drawers, you must remove all items from the drawer.
Then open the drawer fully to gain access to the bottom slides. Now inspect and identify the release mechanisms on the slides. After that, activate the release mechanisms to release the drawer.
Find out how to easily remove kitchen drawers with bottom slides in just a few simple steps. Our comprehensive guide will give you all the instructions to tackle this task successfully.
Jump to Section
How to Remove Kitchen Drawers With Bottom Slides: Step-By-Step Guide
To remove kitchen drawers with bottom slides, follow our step-by-step instructions:
- Step 1: Remove Items from the drawer
- Step 2: Open the drawer fully
- Step 3: Inspect and Identify the bottom slides’ release mechanisms
- Step 4: Activate the release mechanisms (if applicable)
- Step 5: Carefully lift the drawer from the slides
- Step 6: Inspect the slides for any damages or issues
Let’s discuss this in more detail:
Step 1: Remove Items From the Drawer
Clear out all the items from the drawer. Allow it to become an empty canvas ready for transformation. Take care not to damage any fragile or breakable items while removing them. This step is crucial as it ensures a smooth and hassle-free removal process.
Step 2: Open the Drawer Fully
Now that the drawer is completely empty, it’s time to open it up and unveil the hidden possibilities inside fully. To open the drawer fully, firmly grasp both sides of the handle with your hands.
Slowly pull the drawer towards you, using even pressure on both sides. Keep pulling until the drawer is fully extended, and you can access all its contents easily.
Step 3: Inspect and Identify the Bottom Slides’ Release Mechanisms
Bottom-mount drawer slides are the typical type used in kitchens. They are easily identifiable due to their visible tracks.
Start by examining the bottom slides of the kitchen drawer. Look for any visible tracks or mechanisms underneath the drawer. These visible tracks indicate that you have bottom-mount drawer slides.
Step 4: Activate the Release Mechanisms
Now locate the release mechanisms on the kitchen drawer and gently activate them to unlock the bottom slides. These mechanisms are usually located near the back on both sides of the drawer. Look for small levers or buttons that can be pushed or pulled.
Once you have found them, apply gentle pressure to release the slides from their locked position. Do this step carefully to avoid any damage to the drawer or slides.
Step 5: Carefully Lift the Drawer From the Slides
Lifting the drawer from its slides requires caution and precision to prevent potential damage. Begin by firmly grasping both sides of the drawer, ensuring a secure grip. Slowly lift the drawer upwards, being mindful of any obstacles or obstructions that may impede its movement.
As you lift, maintain an even pressure on both sides to ensure the drawer remains balanced and does not tilt or tip over. Continue lifting until the drawer is completely detached from the bottom slides.
Step 6: Inspect the Slides for Any Damages or Issues
After lifting the drawer from the slides, inspect them for any damages or issues. Look closely at the bottom and top slides to ensure they are in good condition. Also, check for any signs of wear, such as bent metal or loose screws.
If you notice any problems, addressing them before reinstalling the drawer is important to prevent further damage or difficulties.
Maintenance Tips for Your Kitchen Drawers Bottom Slides

We recommend that you follow two crucial maintenance tips to ensure the smooth operation of your kitchen drawers with bottom slides.
Cleaning the Slides Regularly
Over time, dirt and debris can accumulate on the slides, making them sticky or difficult to open and close. Regularly cleaning your drawer slides with a homemade all-purpose cleaner is essential to keep them functioning smoothly.
Easily clean your slides by removing the drawer from its tracks and wiping them down with a soft cloth or sponge soaked in warm soapy water.
Dry the slides completely before reattaching the drawer. This simple maintenance task will help prolong the life of your kitchen drawers and ensure that they continue to operate smoothly.
Lubricating the Slides for Smooth Operation
After cleaning, we recommend you ensure your kitchen slides glide effortlessly by regularly lubricating them for a smooth and seamless operation. Start by removing the drawer completely from the cabinet.
Now locate the metal slides on both sides of the drawer and clean off any debris or dirt using a soft cloth. Apply a small amount of silicone-based lubricant to each slide, ensuring even coverage. Reinsert the drawer into the cabinet and test its movement to ensure it glides smoothly.
Other Types of Drawer Sliders You Have in Your Kitchen
You may encounter some other types of drawer slides in your kitchen. These include:
#1 Undermount Drawer Slides:
Undermount kitchen drawer slides are attached to the cabinet sides or bottom using an L-shaped bracket. The drawer box attaches to the slides with special clips underneath.
The main advantage of under-mount slides is their hidden installation, providing a sleek and clean look to the kitchen cabinets. They also offer more adjustability for fine-tuning drawer front positioning.
But, they can be more expensive than other types, and drawer boxes must adhere to specific instructions for proper installation.
#2 Ball Bearing Drawer Slides:
Drawer slides with steel ball bearings are the most common type, consisting of a thin track containing steel balls. They provide smooth and effortless movement, allowing the drawer to glide in and out with minimal friction.
These kitchen drawer slides are easy to install and can hold significant weight. But, they are visible when the drawer is open, and precise measurements are crucial when building the drawer box for proper functionality.
#3 Center Mount Drawer Slides:
Center-mount drawer slides consist of a rail running down the middle of the drawer box and rollers on either side.
These slides are suitable for lightweight applications and are commonly used in pull-out trash can cabinets. However, they may not be ideal for large weight capacities and can lead to drawer misalignment over time.
#4 Roller Drawer Slides:
Roller drawer slides are usually found in cheaper furniture and cabinetry. They are attached along the corners of the drawer box and use rolling wheels to allow the drawer to move back and forth along the track.
These kitchen drawer slides are less sturdy than other options and may not be suitable for heavy loads. Installing them perfectly level is essential to prevent the drawer from rolling open independently.
#5 Wooden Drawer Slides:
Older furniture usually has wooden drawer slides that are attached to a cabinet’s sides or bottom with a groove cut into the drawer box’s side.
This kitchen drawer slide type can be cost-effective but requires periodic waxing for smooth operation. Also, wooden slides may experience seasonal wood expansion, which can cause sticking and might not be as adjustable as other types.
FAQs
How do I choose a bottom-mount kitchen drawer slide?
Choosing the perfect bottom-mount kitchen drawer slide is crucial. Start by considering the width of your drawer. This simple step will ensure optimal support and seamless functionality.
Also, checking the spec sheet for the chosen slide is crucial to ensure it meets the specific allowance requirements. Bottom-mount slides have specific clearance requirements, so it’s important to double-check these measurements to ensure a proper fit.
Remember to consider the necessary side-to-side clearance for your drawer. This will ensure that the drawer can open and close without any obstructions.
What is the difference between the bottom-mount and under-mount kitchen drawer slides?
When mounting your kitchen drawer, the bottom and under-mount slides differ in their attachment locations.
Bottom mounts are attached to the bottom of the drawer and side of the cabinet, while under mounts are attached underneath (invisible) the drawer and cabinet side. This distinction affects the visibility of the slides and can impact the overall aesthetic appearance of your kitchen drawers.
Do under-mount slides work better than bottom-mount slides in kitchen drawers?
Undermount slides may be more expensive, but they offer a significant advantage, a much smoother operation. This means that when you open and close your drawers, they will glide effortlessly and quietly. Under-mount kitchen drawer slides are worth considering if you value a seamless user experience.
Conclusion
Removing kitchen drawers with bottom slides is a simple process with few steps. Following the step-by-step guide we provided above, you can safely and efficiently remove your drawers for cleaning or maintenance purposes.
Regularly maintaining your kitchen drawer’s bottom slides is also important to ensure their smooth operation. Consider weight capacity and durability factors when choosing a bottom-mount kitchen drawer slide.
While under-mount kitchen drawer slides have advantages, both options serve their purpose effectively depending on your specific needs and preferences.