Maximizing kitchen space and organization is a perennial challenge for home cooks and chefs alike. A DIY hanging pot rack presents an elegant and practical solution to this age-old predicament. But how do you build a hanging pot rack with minimal effort and expense?
To build a hanging pot rack for your kitchen, gather materials like wood, screws, a saw, and a drill. Cut the wood into desired lengths and shapes, then assemble the framework and drill holes for mounting hooks. In the end, secure the pot rack to the ceiling.
Let’s discuss the steps in creating your DIY hanging pot rack, the benefits you can reap from it, and the height you should use. Let’s go.
Jump to Section
How Do You Build a Hanging Pot Rack for Your Kitchen?

When creating a hanging pot rack in your kitchen, there are a few steps to take. For your convenience, we have summarized the steps from our extensive research online.
Step 01: Gather Materials and Tools
Start by gathering all the materials and tools you’ll need for this project. You’ll require:
- Two 1 by 4 or 2 by 4 wooden planks
- Screws for wood measuring 2 inches
- 4 pieces of steel screw eye bolts measuring 2-1/4 inches
- 4 pieces of steel hooks 2-¼ inches long
- Wooden plugs
- Hooks for robes
- Painting, staining, or coating desired
- Liquid wood glue
- Cordless drill with drill bits and drivers
- Drill bit countersink
- Miter saw powered by electricity
- Electric sander
- Chain
- Tape measure
- Pencil
- Stud finder
- Sandpaper
- Pliers.
Step 02: Trim the Planks
After gathering the supplies, using your electric miter saw, you’ll need to cut the following pieces from your chosen type of lumber:
- 2 pieces 48-inch planks
- 2 pieces 24-inch planks
- 2 pieces 22.1/2-inch planks
We recommended measuring and marking each piece accurately before making the cuts. Ensure the saw blade is set at a 90-degree angle for straight cuts.
Take your time and use steady pressure to guide the wood through the saw blade smoothly. And always safety goggles are essential when operating power tools.
Step 03: Allow the Layout to Dry
Now, ensure all the pieces are laid out properly before moving on to the next step. You should align the 2 parts of timber across from each other. Then, position the ends of the 2 parts of timber of 24 inches.
In the end, add the pair of 22½ inch plank pieces between the long ones. This layout will form the base of your pot rack and ensure that everything fits together correctly.
Take a moment to double-check before proceeding with the assembly process.
Step 04: Assemble the Border Sections
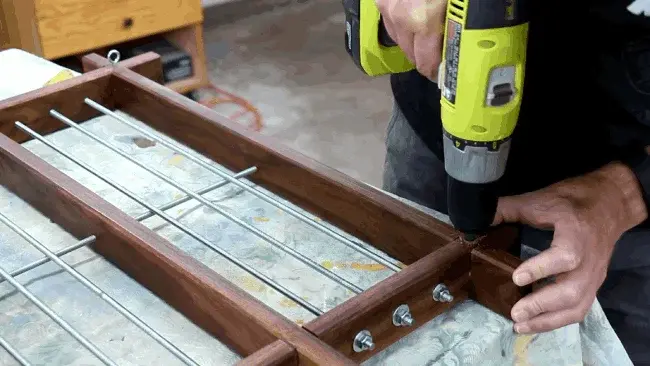
Use kitchen-grade 2-inch wood screws to attach the perimeter pieces to the base.
Start by lining up one 24-inch plank with one end of another 48-inch plank. Ensure they are flush, and then drill two pilot holes through both ends. Secure them together tightly using the wood screws. Repeat this process for the other side, ensuring all corners are square and secure.
Step 05: Create the Internal Structure
To start, you’ll need to gather two pieces 22½2 inches wide and place them 16 inches apart within your designated area. These pieces will form the inner framework of your hanging pot rack.
Once you have placed them in position, secure them firmly using kitchen-appropriate wood screws of two inches in length. Make sure to drive the anchors into the 48-inch plank and the four corners of the perpendicular kitchen board.
Step 06: Insert the Wooden Plugs
After securing the inner framework, we advise applying wood glue and inserting the wooden plugs in the countersunk slots for a polished look.
Simply squeeze some kitchen-friendly wood glue into each countersink hole, then gently tap the wood plugs in place using a hammer or mallet. Ensure they are flush with the surface of your pot rack for a seamless finish.
Step 07: Sand the Rack
Smooth out the wooden plugs on your project using coarse-grit sandpaper with a kitchen-approved electric sander. Make sure to apply even pressure, moving the sander in small circular motions over each plug. This will help blend them seamlessly with the wood’s surface.
Once you’re satisfied with the smoothness, switch to #220 sandpaper for a polished finish. Sanding is crucial for achieving a professional look for your hanging pot rack.
Step 08: Polish the Wooden Surface
Apply your kitchen-style finish to the wood, such as staining or painting, ensuring it complements your desired aesthetic. Before you begin, ensure the wood is clean and free from dust or debris.
Use a brush or roller to apply the finish, following the manufacturer’s instructions for drying and curing time. Consider using a sealer or topcoat for added protection and durability. Once dry, admire your beautifully finished wood that will enhance the overall look of your hanging pot rack.
Step 09: Attach the Robe Hooks and Eye Bolts
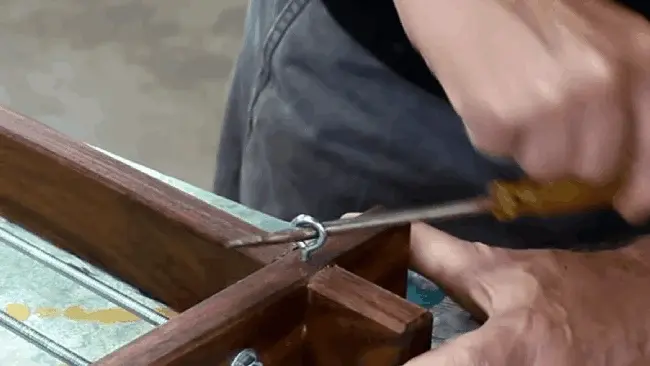
To secure your kitchen utensils, you’ll want to strategically place hooks on the wooden boards and attach them using robe hooks.
Ensure the hooks are placed conveniently where you can easily access your pots and pans. Also, create pilot holes in the upper section staggered pot holder and insert four eyebolts near each corner of the frame.
Step 10: Find and Add Ceiling Joists
Utilize a kitchen-specific stud finder to accurately locate the joists separated by 48 inches while maintaining the standard 16-inch spacing.
Depending on the orientation of the roof joists within your kitchen space, create pilot holes at intervals of 16 to 24 inches or 32 inches. This will ensure stability and proper weight distribution for your hanging pot rack.
After locating two ceiling joists, create pilot holes at appropriate intervals and securely affix upper hooks using kitchen-appropriate pliers.
Step 11: Attach the Pot Rack to the Ceiling
Once you’ve suspended the chains from the roof hooks and ensured they’re at the right length, you can finalize the installation of your pot rack.
Throw a piece of the kitchen-friendly metal chain between the two eye bolts on one side of the pot rack. Repeat this step on the opposing side.
From kitchen experts, securing the chains tightly so your pot rack hangs securely is always recommended. This will add both functionality and style to your kitchen space.
What Makes DIY Hanging Pot Racks Perfect for Kitchens?
When finding the perfect storage solution for your kitchen, DIY hanging pot racks are a great option. Here are some of the benefits they offer:
- Optimal space utilization
- Enhanced organization
- Visual appeal
- Quick accessibility
Let’s take a look at each of these benefits in more detail.
No 01: Optimal Space Utilization
To maximize space in your kitchen, you should utilize vertical storage options like hanging pot racks. These racks are perfect for freeing up valuable cabinet and countertop space that can be better used for other items.
No 02: Enhanced Organization
By suspending your pots, pans, and utensils from a rack, you’ll have everything neatly displayed and easily accessible. No more rummaging through cabinets or stacking items on top of each other. With a hanging pot rack, you’ll have a well-organized kitchen where everything has its place.
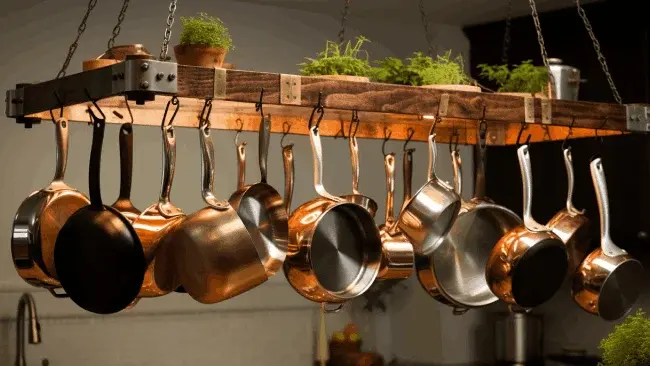
No 03: Visual Appeal
Creating your own pot rack allows you to add a touch of personal style and charm to your kitchen decor. Regarding visual appeal, you have endless possibilities. You can create a visually appealing display that adds character to your kitchen by hanging your pots and pans overhead.
Use reclaimed wood or wrought iron for a rustic look or sleek stainless steel for a modern vibe. You can also incorporate decorative elements such as hooks with intricate designs or paint the rack in a color that complements your kitchen’s palette.
Aside from that, having your beautiful pots and pans on display adds a touch of charm to your cooking space. The key is to choose elements that reflect your unique taste and enhance the overall aesthetic of your space.
No 04: Quick Accessibility
Having a hanging pot rack within reach improves your ability to access the pots and pans you need while cooking quickly. No more searching through cabinets or digging through stacks of cookware.
With a hanging pot rack, everything is right at your fingertips. This saves you time and makes the cooking process more efficient.
FAQ’s: How to Build a Hanging Pot Rack
What height should a pot rack be mounted to?
For a ceiling-mounted pot rack in the kitchen, it is recommended to subtract the ceiling height from your height, minus a 12-inch reach, and minus approximately 12-inches for pots. This calculation is based on the average height of one’s reach, which is about one foot taller than their height.
Are hanging pot racks a good idea?
Hanging pot racks are a great idea for your kitchen. Not only does it provide easy access to your cooking tools, but it also saves valuable storage space.
With a hanging pot rack, you can easily organize your pots and pans by size and material, ensuring each item has its designated hook. This makes finding the right pan easier and more obvious when replacing a worn or damaged pot.
Conclusion
Building a hanging pot rack for your kitchen is a practical and rewarding DIY project. Following the steps outlined in this article, you can create a functional and stylish storage solution for your pots and pans.
Hanging pot racks are perfect for kitchens as they free up valuable cabinet space and add a touch of elegance to the room. With the right tools and materials, you can easily mount the rack at an ideal height that suits your needs.
It is always advisable for you to measure twice and cut once.