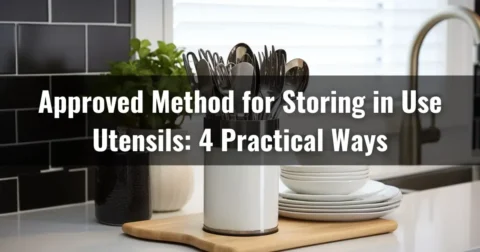
Wooden utensil holders are practical additions to your kitchen, but not always possible to get one that fits properly or blends with your kitchen decoration. Crafting your wooden utensil holder allows you to customize its size, design, and finish to match your kitchen’s decor and your unique style.
The possibilities are endless, whether you prefer a rustic countertop caddy, a space-saving wall-mounted organizer, or a rotating Lazy Susan.
To DIY wood utensil holders in your kitchen, gather the needed materials, such as a wooden board, screws, a drill, and sandpaper. Prepare your materials by measuring and marking where you’ll cut the wooden pieces. Once you’ve cut out the pieces, attach the holder using screws.
You might think that making your wooden utensil holder sounds daunting, but this DIY guide makes it easier than you think. Using just a few simple steps, we will describe how to create a stylish and functional storage solution for your kitchen.
Jump to Section
How to Make a DIY Wood Utensil Holder for Your Kitchen?

Wood utensil holders are practical and add a sense of home to any kitchen. Here’s what you need to do to make your own wooden utensil holder:
- Step 1: Prepare your materials
- Step 2: Cut out wooden pieces
- Step 3: Assemble the holder
- Step 4: Sand and smooth the holder
- Step 5: Apply veneer banding on the holder
- Step 6: Seal the wood holder
- Step 7: Personalize and enjoy
Let’s go over the steps for making your DIY wood utensil holder in more detail.
For DIY wood utensil storage, you’ll need pine wood boards, wire brads, wood glue, duct tape, sandpaper, wood sealer, wood veneer banding in contrasting wood tones, a craft blade, iron, steel ruler, and a cutting mat.
After gathering these materials, start following our steps:
Step 1: Prepare Your Materials
Before cutting the pine wood boards, ensure you have measured and marked the dimensions for your utensil holder. Typically, a kitchen utensil storage measures around 4 inches by 4 inches at the base and 8-10 inches in height. You can adjust the size to fit your utensils and kitchen preferences.
We recommend using a steel ruler and craft blade for precise measurements to cut the boards. Ensure your work area is well-ventilated and free of any hazards. Take your time and make accurate cuts to achieve the desired size for your utensil holder.
Step 2: Cut Out Wooden Pieces
Start by following the marked lines precisely. We strongly suggest ensuring your craft blade is sharp to achieve clean cuts. Cut slowly and steadily along the lines, ensuring accuracy and avoiding any mistakes. Using a cutting mat is essential to protect your work surface and prevent damage to the blade.
Step 3: Assemble the Holder
Position the wooden pieces according to your design and press the glued edges firmly together. To reinforce the joints, we advise inserting wire brads at regular intervals along the edges. Use a hammer to gently tap the brads into place.
While the glue dries, you can use duct tape to hold the pieces together. Wrap the tape around the exterior of the holder to keep the wooden pieces aligned until the glue sets. Be sure to maintain a square and level position during this assembly process.
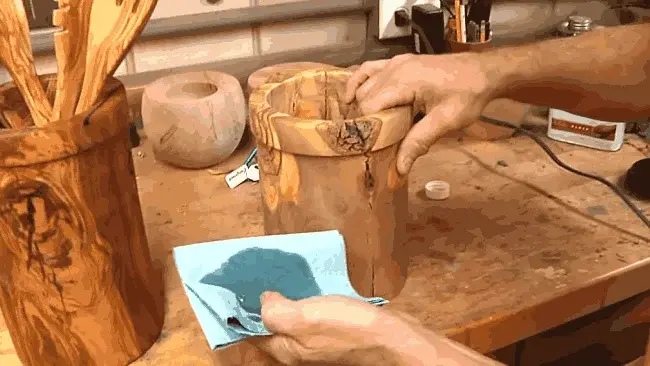
Step 4: Sand and Smooth
To create a smooth and even finish on your DIY wood utensil organizer, begin by removing rough edges and excess glue with coarse-grit sandpaper.
Begin by sanding the entire surface, inside and outside, to ensure a consistent result. Pay special attention to the edges and corners, as they accumulate more imperfections.
Move the sandpaper in a back-and-forth motion, applying even pressure. As you progress to a finer-grit sandpaper, the roughness gradually disappears, leaving behind a polished surface. Keep sanding until the entire holder feels smooth to the touch.
We recommend wiping away any dust or debris before proceeding to the next step.
Step 5: Apply Veneer Banding
Ensure you carefully position the wood veneer banding along the edges of your utensil holder, ensuring it aligns evenly with the surface. Start by measuring the length of veneer banding needed for each edge, allowing for some extra length to trim later.
Then, use a steel ruler and a craft blade to make straight cuts on the veneer banding. Once the cuts are made, take the adhesive side of the veneer banding and position it along the edges of your storage. It’s crucial to align it evenly for a seamless look.
Apply even pressure with an iron over the veneer banding to activate the adhesive and ensure a secure bond. Then, trim any excess veneer banding with the craft blade, leaving a neat and tidy finish.
Step 6: Seal the Wood
Begin by ensuring that the surface is clean and free from dust or debris.
Using a clean brush or cloth, spread the sealer in smooth, even strokes, covering all areas of the holder. Pay special attention to the veneer banding, as this is often the most vulnerable part of the holder.
Allowing the sealer to dry completely is crucial to ensure optimal protection and durability for your wooden utensil storage.
Step 7: Personalize and Enjoy
After allowing the stain or paint to dry completely, your DIY wood utensil storage is ready. Now it’s time to add your personal touch and enjoy your newly customized wooden utensil holder in your kitchen.
We recommend placing it conveniently in your kitchen, ensuring easy access to your essential kitchen tools. Then, add a few decorative touches, like magnets, ribbons, or decorations, to make your utensil holder unique.
The customized design allows you to match it to your kitchen decor, creating a cohesive and stylish look. Enjoy the functionality and aesthetic appeal this personalized wooden utensil holder brings to your kitchen.
Which Wooden Utensil Holder Fits Your Kitchen Perfectly?
When considering the best wooden utensil holder design for your kitchen, consider the following 5 ideas.
No 01: Wall-Mounted Wooden Utensil Holder
You’ll love the versatility of the wall-mounted wooden utensil holder for organizing your kitchen and keeping your cooking essentials within reach.
The holder features hooks or pegs for hanging utensils, ensuring easy access while cooking. Moreover, some designs include shelves or compartments for storing other kitchen tools or spices, maximizing functionality and convenience.
Using a DIY wall-mounted wooden utensil holder, you can customize it to fit your kitchen perfectly. With its practical design and easy installation, this holder is an excellent addition to any kitchen, providing an organized and clutter-free workspace.
No 02: Countertop Wooden Utensil Caddy
Pick out a DIY countertop wooden utensil caddy that matches your kitchen decor and keeps your cooking tools neatly organized.
The caddies typically have divided compartments or slots to keep your utensils in place, preventing them from rolling around and getting lost. You can also DIY its designs with additional compartments for storing napkins, salt and pepper shakers, or other small kitchen items.
No 03: Drawer Wooden Utensil Organizer
To maximize your kitchen drawer space, consider DIY a drawer wooden utensil organizer with multiple compartments for easy organization and accessibility.
With its various compartments and dividers, you can neatly separate and arrange your utensils, ensuring everything has its designated place. The multiple compartments allow you to organize different utensils, such as knives, forks, spoons, and kitchen gadgets.
No 04: Lazy Susan Wooden Utensil Holder
You can keep your utensils within easy reach with your DIY wooden utensil holder. With its 360-degree rotating base, you can effortlessly access your utensils without the hassle of rummaging through drawers or caddies.
The Lazy Susan features multiple compartments or slots, providing ample space to organize different types of utensils. Its sturdy construction ensures durability and stability, making it a reliable addition to your kitchen.
No 05: Hanging Wooden Utensil Rack
You can create a creative and organized way to store your kitchen utensils with a DIY hanging wooden utensil storage. This type of storage is typically suspended from the ceiling or a wall-mounted bracket, providing an eye-catching display in your kitchen.
To match your kitchen’s aesthetic, you can choose from various styles. Utensils are easily hung from hooks or pegs. Some racks even include shelves or baskets for additional storage.
FAQ’s: DIY Wood Utensil Holder
According to our research, here are the most frequently asked questions regarding hanging wooden utensil storage.
1. What wood species are best for a wooden utensil holder?

To ensure durability and enhance the aesthetic of your kitchen, use hardwoods like pine, maple, oak, cherry, or walnut for your DIY wooden utensil holder. These hardwoods are known for their strength and resistance to wear and tear, making them ideal for a utensil holder that will see constant use.
2. Are there any food safety concerns with using a wooden utensil holder?
While DIY wooden utensil holders are generally safe for kitchen use, there are a few food safety considerations to remember.
If you plan to store food items directly in the holder, using food-safe finishes on the wood is recommended. These finishes create a protective barrier preventing harmful substances from leaching into your food.
Also, it’s crucial to regularly clean and maintain the wooden utensil holder to prevent the growth of bacteria. Food particles and moisture can easily get trapped in the wood, providing a breeding ground for bacteria.
3. Can I use my wooden utensil holder for non-kitchen purposes?
Feel free to repurpose your DIY wooden utensil holder for other purposes like organizing art supplies or storing small trinkets.
Utensil holders made of wood are sturdy storage solutions that can accommodate a variety of items. You can use the compartments to neatly organize and separate different types of art supplies, such as paintbrushes, pens, and markers.
A wooden holder’s natural, rustic look can also add charm to your workspace. The divided sections also store small trinkets like jewelry, buttons, or beads.
Conclusion
Now you’ve successfully crafted a DIY wood utensil holder to revolutionize your kitchen organization. With its precise measurements and expert construction, this utensil storage solution is the epitome of perfection.
The process allows you to express your creativity while enhancing the organization of your kitchen essentials, regardless of the design you select. With the right materials, tools, and some craftsmanship, you can create a wooden utensil holder that serves its purpose and becomes a treasured addition to your kitchen.
It’s time to craft a wooden utensil holder that will elevate both your culinary experience and the ambiance of your kitchen. Let go of clutter and hello to efficiency as you proudly display your utensils in this stylish and functional holder.