Keeping your knives organized in your kitchen and easily accessible is essential for any cooking enthusiast. Although several pre-made knife blocks are available, they may not be perfect for your knife set. A DIY knife block is a practical, cost-effective solution to the problem of storing knives in an orderly manner.
You can create a DIY knife block using wood skewers that will organize and make it easier to access your knives. Organizing your knives safely and efficiently with a universal tin can stuffed with wooden skewers is possible. You can also make a modern knife block out of wood and plexiglass to showcase your knives.
Throughout this article, we’ll discuss some interesting DIY knife block ideas you can easily make yourself. With our step-by-step guide, you can create a customized knife block that suits your style and needs.
Jump to Section
3 Unique DIY Knife Block Ideas
A DIY knife block solves the problem of storing knives easily. The following are 3 unique ideas to create your DIY knife block.
- DIY knife block with wood skewers inside
- DIY universal tin can and wooden skewers knife block
- DIY transparent knife block with plexiglass
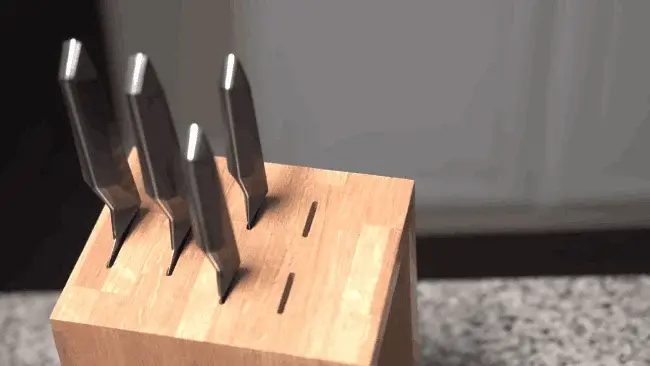
1. DIY Knife Block with Wood Skewers Inside
You can easily create a DIY knife block with wood skewers inside to keep your knives organized and accessible. This simple and practical solution will save space in your kitchen and ensure your knives are safely stored.
You can arrange the skewers in a grid-like pattern inside the base, ensuring they’re tightly packed. This DIY knife block is a cost-effective and efficient way to organize your knives while adding a touch of creativity to your kitchen.
2. DIY Universal Tin Can and Wooden Skewers Knife Block
Using a universal tin can filled with wooden skewers is practical and cost-effective, allowing you to organize your knives safely and efficiently. The easiest way to secure your knives is to store them in a tin can that has been cleaned and emptied, preferably with a wide opening.
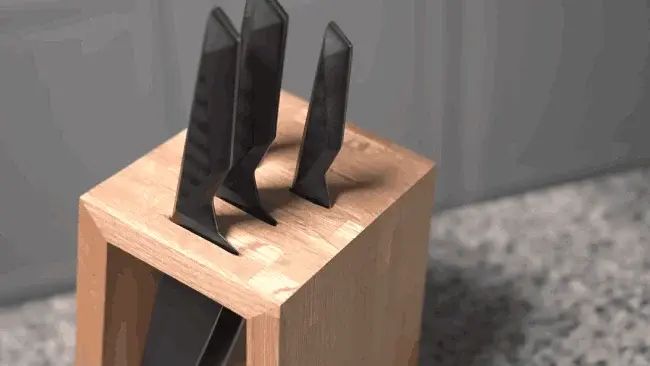
3. DIY Transparent Knife Block with Plexiglass
If you’re looking for a modern and sleek knife block, try making one with plexiglass and showcase your knives beautifully. Plexiglass, also known as acrylic glass, is a durable and transparent material that adds elegance to your kitchen.
How to Make Your DIY Knife Block Easily: Step-by-Step
Creating a DIY knife block with wood skewers inside is fun and practical. This homemade knife block keeps your knives organized and easily accessible. Here’s a step-by-step guide on how to make one:
STEP 1. Design Your Knife Block
Decide on the size and shape of your DIY knife block. A typical knife block has slots of varying sizes to accommodate different blade lengths. You do not need additional slots for knives when making a DIY knife block with wood skewers inside.
Just consider the types of knives you have, such as chef’s, bread, and paring, to create the perfect size block that holds each type securely.
STEP 2. Measure and Cut the Wooden Block
You should begin by determining the size you need based on the space available for your knives. Measure the length, width, and height, ensuring it’s large enough to hold all your knives comfortably. Once you have these measurements, mark them on the wooden block.
It’s time to cut the wood into the desired size for your knife block. A common size is 10-12 inches in length, 4-5 inches in width, and 8-10 inches in height. Remember to also cut a base according to the size for holding skewers.
STEP 3. Sand and Smooth the Edges
You should carefully sand and smooth the edges of the wooden block to ensure a polished and professional finish. Start by using fine sandpaper to smooth out any rough surfaces or imperfections.
Hold the sandpaper firmly and smoothly move it along the edges. Be sure to sand smoothly and apply firm pressure to avoid uneven surfaces. Switch to a higher grit sandpaper to get a smoother finish as you progress. This will help to remove any remaining roughness and create a polished look.
STEP 4. Assemble the Block
Align the slots of the wooden pieces and firmly attach them using wood glue and clamps for stability. Apply wood glue to the edges of the slots and ensure it covers them evenly. Then, carefully assemble the pieces, ensuring the slots are aligned properly.
Once the pieces are in place, clamps hold everything together until the glue dries. Make sure the clamps are firmly secured to provide maximum stability. Also, don’t forget to attach the base to the structure using the same method.
STEP 5. Prepare and Cut the Skewers
Cut the skewers to the desired length using a saw or sharp utility knife. Measure the length of your wood skewers and make sure they’re 1-2 inches shorter than the height of the wooden block. This will ensure the skewers don’t hang above the block’s surface.
Once you have measured and marked the length, carefully cut the skewers using a saw or a sharp utility knife. Make sure to follow proper safety precautions when using these tools.
STEP 6. Glue and Insert Skewers
After applying wood glue inside the hole, firmly but not forcefully insert the skewers into it, ensuring they’re securely in place. The wood glue will support and help hold the skewers in place. Make sure to insert the skewers evenly and at a slight angle to allow for easy access to the knives.
Gently press down on the skewers to ensure they’re firmly seated in the hole. Take a moment to double-check that all the skewers are level and straight. Once you’re satisfied with the placement, allow the glue to dry completely.
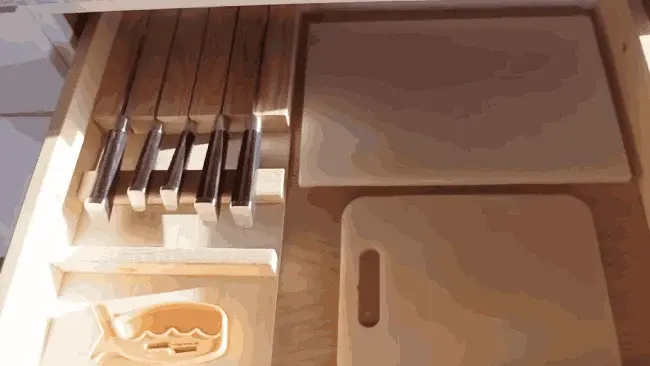
STEP 7. Arrange Your Knives
Once the block is completely dry and the skewers are securely glued, it’s time to arrange your knives. Start by inserting the blades between the skewers holding each knife securely. You want to avoid any accidents or injuries caused by loose knives falling out of the block.
To maximize accessibility, position your knives within easy reach of each other by spacing them evenly throughout the DIY knife block. Take the time to organize your knives based on their size and purpose.
FAQ’s: DIY Knife Block Ideas
What are the best materials for a DIY knife block?
While traditional wooden knife blocks are a popular choice, they can be difficult to clean and aren’t dishwasher-safe. That’s where bamboo comes in as a great alternative.
Not only is bamboo easy to clean, but it also has a sleek and modern look. Also, translucent materials are an innovative option, allowing you to see your knives at a glance, ensuring you grab the right one for the job.
How can I maintain and clean my DIY knife block?
Maintaining and cleaning a DIY knife block is crucial for the longevity and quality of the knives. Regularly wiping down your knife block with a damp cloth to remove loose dust and debris is a great tip.
Also, if your knife block is made of wood, consider reapplying a food-safe finish every few months to protect the wood and maintain its appearance. By keeping your knife block clean, you not only help ensure its appearance but also maintain the safety and cleanliness of your knives.
Conclusion
A DIY knife block is not only a practical solution to keep your knives organized, but it’s also a fun and creative project to undertake. Whether you choose a wooden block with skewers, a universal tin can, or a transparent block made with plexiglass, each option offers a unique style and functionality.
With the step-by-step instructions, you can easily make a knife block that suits your kitchen and personal taste. So grab your materials and tools, and start crafting your knife block today. Your organized kitchen and perfectly placed knives will thank you.