
Constructing a rolling spice rack next to your fridge is an excellent DIY project that uses often-underutilized space in your kitchen. It’s a practical solution for organizing your spices efficiently, ensuring everything is within easy reach when cooking up a storm.
Making a DIY rolling spice rack next to the fridge requires careful planning and precise measurements to fit seamlessly. You have to build a sturdy frame using pine boards as the foundation for your spice rack.
Then, you must add essential shelf supports, ensuring they are strategically placed to accommodate your spice containers while maintaining stability.
Creating a well-structured frame is just the beginning; you’ll need to install more components to complete your DIY rolling spice rack fully.
We will cover all the steps in-depth to successfully build a rolling spice rack for your kitchen next to the refrigerator.
Jump to Section
Building a DIY Rolling Spice Rack Next to Fridge: 11 Steps to Follow
To make your DIY spice organizing dreams a reality, follow these 11 easy steps to create a rolling spice rack right next to your fridge.
Now, take a look at each of the 11 essential steps for creating a DIY rolling spice rack next to your refrigerator.
Step 1: Collect All the Tools and Materials You Need
Before you start building your DIY rolling spice rack next to the fridge, you must gather all the necessary tools and materials.
You will need pine boards for the frame, a Masonite sheet or plywood for the back panel, four non-swivel caster wheels, wood screws, and wood glue.
Aside from that, you will also need paintable wood filler, five dowels, a nail gun, a circular saw, and a power drill with drill bits large enough to accommodate your dowels. A medium grit sandpaper, a measuring tape, a square, and a level are also required.
Step 2: Planning Your Rolling Spice Rack
To build a rolling spice rack, you should plan the structure and overall construction. Measure the space available next to your refrigerator carefully. Consider any obstructions or obstacles like electrical outlets or switches that may affect the placement and design.
Next, consider the sizes of your spice containers and pantry items to determine the number of shelves you want and their respective heights.
Sketch out a rough diagram of your spice rack, including the overall dimensions, shelf placements, and any additional features you desire. Focus on the spacing between shelves and the space between the frame and the fridge for easy rolling.
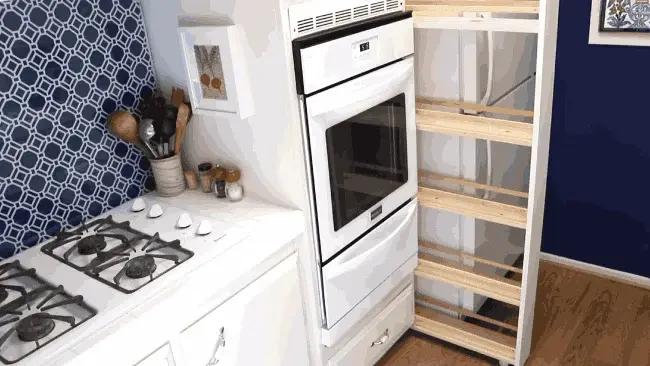
Step 3: Building the Frame
With your detailed plan in hand, you can start building the frame of your rolling spice rack. Start by cutting the pine boards according to your plan measurements. Use a circular saw for clean, straight cuts. Double-check your measurements and cut with precision for ideal results.
Once your boards are cut to size, begin assembling the frame. Lay out the pieces on a flat, stable work surface, arranging them according to your plan. Ensure the corners are at right angles and the frame is level and stable.
To create a durable frame, combine wood glue and wood screws. Apply wood glue to the joints where the boards meet, then secure them in place with wood screws. This provides the necessary reinforcement to ensure the frame can withstand the weight of your spices and pantry items.
Step 4: Adding Shelf Supports
To create sturdy and functional shelves for your spice organizing rolling rack, carefully measure, cut, and attach shelf supports. Decide where the shelves should go in the frame by measuring and marking them. Use a measuring tape, square, and pencil to ensure accuracy.
Next, cut pine plank strips to serve as shelf supports. The width of these strips should match the depth of your frame. Use a circular saw to make these cuts, and ensure they are straight and even.
Now, attach the supports below each marked position on both sides of the inner frame. Apply wood glue generously to the backside of each support strip. Position them vertically inside the frame, aligning them with your marked measurements. Use wood screws to secure the supports in place.
For added stability, consider securing the middle shelf further with nails. Use a nail gun or hammer and nails to secure the middle shelf firmly to the support strips.
Step 5: Building the Back Panel
After the shelves are in place, it’s time to build the back panel. Choose a lightweight material like Masonite or plywood for the panel, keeping the unit light.
Use a circular saw to cut the chosen material to the desired size. Paint the white side of the panel with a foam roller and stencil it as desired.
Now, attach it to the frame by nailing or screwing it to the back edges of the pine boards. Use wood glue along the edges of the frame where it meets the back panel for added reinforcement.
Step 6: Dowel Installation
Once the shelves are in place, mark the locations where you want the dowels to be installed. Use your power drill and drill bits large enough for your dowels to make the holes. Apply a small amount of wood glue to the ends of the dowels before sliding them into the holes. This will help create a stronger bond.
Now, carefully slide the dowels into the pre-drilled holes and secure them with wood glue and screws. Ensure the dowels are inserted straight and level, aligning them with the marked positions inside the frame.
Once the dowels are in place, use screws to secure them further. Check that all the dowels are firmly in place.
Step 7: Install Caster Wheels
To make your rolling spice rack mobile and easy to move, you’ll need to attach caster wheels to the bottom of the frame. Select four non-swivel caster wheels for installation.
Position one caster wheel at each corner of the frame’s bottom, ensuring even spacing for stability. Secure the caster wheels in place using wood screws, making sure they are long enough to hold the wheels securely but not too long to protrude through the frame.
Step 8: Fill and Sand
Meticulously fill all the nail holes and any gaps with paintable wood filler. Pay close attention to any blemishes or irregularities in the wood surface.
Afterward, run a line of paintable caulk along the sides of the very bottom shelf. Lastly, give the entire spice rack a gentle yet thorough sanding using medium-grit sandpaper to achieve a smooth and even surface for painting.
Step 9: Priming and Painting
Now, you have to apply a coat of stain-blocking primer using a paintbrush or a foam roller to cover the entire spice rack. Allow the primer to dry thoroughly according to the guidelines of the manufacturer.
Once the primer is dry, you can proceed to the painting stage. Using latex paint in a color that complements your kitchen decor, apply an even coat to the spice rack. Depending on your desired coverage and finish, apply several coats and let them completely dry.
Step 10: Installing the Drawer Pull
To make it more convenient to pull your DIY rolling spice rack in and out, you’ll need to install a long drawer pull on the front of the unit. Measure and mark the exact placement of the pull, ensuring it’s centered and won’t interfere with the shelves inside the spice rack.
Using a drill bit that matches the size of the screws provided with the drawer pull, create holes at the marked points. Once the holes are ready, secure the drawer pull firmly in place using the screws or hardware included with the pull.
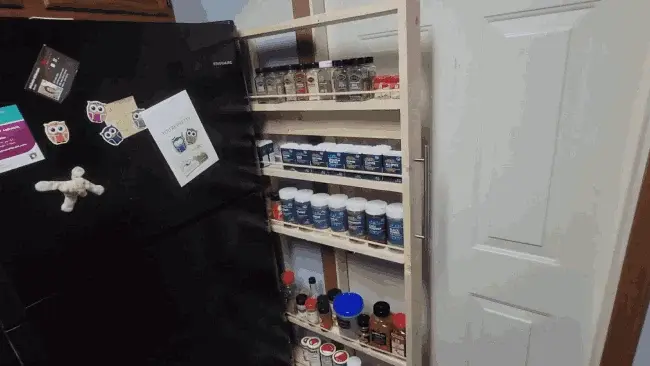
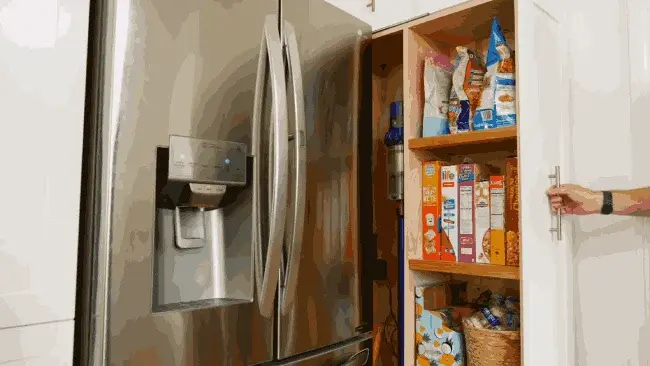
Step 11: Place the Rolling Spice Rack Beside the Fridge
Now that your rolling spice rack has been assembled and painted to your liking, it’s time to position it conveniently next to your fridge. Simply roll it into place, ensuring that it sits flush against the side of the fridge for a seamless look. Double-check that the rack is level so your spices won’t shift or fall.
Frequently Asked Questions
We have noticed that many homeowners commonly have questions and inquiries about building and using DIY rolling spice racks. Here are some of the questions that you might also be wondering about.
How do I arrange the spices in my newly constructed rolling spice rack?
For efficient spice organization in your newly built rolling spice rack, think about grouping similar spices together. This means keeping your baking spices separate from savory ones, making it easier to locate what you need.
You can also opt for alphabetical order, arranging them from A to Z and labeling the containers with the spice names. Place them towards the front to ensure quick access to your frequently used spices.
Incorporating spice racks or tiered shelves can help maximize space and visibility, preventing spices from getting lost in the back. Using transparent containers and clear labels further streamlines the process, making identifying your spices at a glance effortless.
How much space should there be between the fridge and the rolling spice rack?
The ideal space between your fridge and the rolling spice rack should typically be about 2-4 inches. This gap allows for easy mobility of the spice rack and ensures that it doesn’t interfere with the fridge’s door or ventilation.
It also provides enough room to access and open the rolling spice rack comfortably. However, the exact space needed may vary depending on the design of your fridge and spice rack, so it’s essential to measure and customize the gap to suit your specific kitchen layout and preferences.
How do I clean and maintain a rolling spice rack next to the fridge?
To clean and maintain your rolling spice rack next to the fridge, wipe down the surfaces regularly with a damp cloth or a mild cleaning solution.
Pay attention to the caster wheels and clean them to ensure smooth mobility. Periodically check for loose screws or bolts and tighten them as needed to keep the spice rack stable. If you notice any wear and tear, consider applying a fresh coat of paint or finish to protect the wood and maintain its appearance.
Conclusion
For a well-organized kitchen and efficient use of space, constructing a DIY rolling spice rack beside the fridge is rewarding. You can now build and customize your own spice storage solution tailored to your kitchen’s layout and your spice collection’s needs.
Constructing the frame, adding shelves, installing caster wheels, and carefully organizing your spices will transform that often-underutilized space into a functional and stylish addition to your kitchen.
With your spices neatly arranged and within easy reach, cooking will become easier, and your kitchen will be more organized than ever. Enjoy the convenience and satisfaction of a well-executed DIY project.