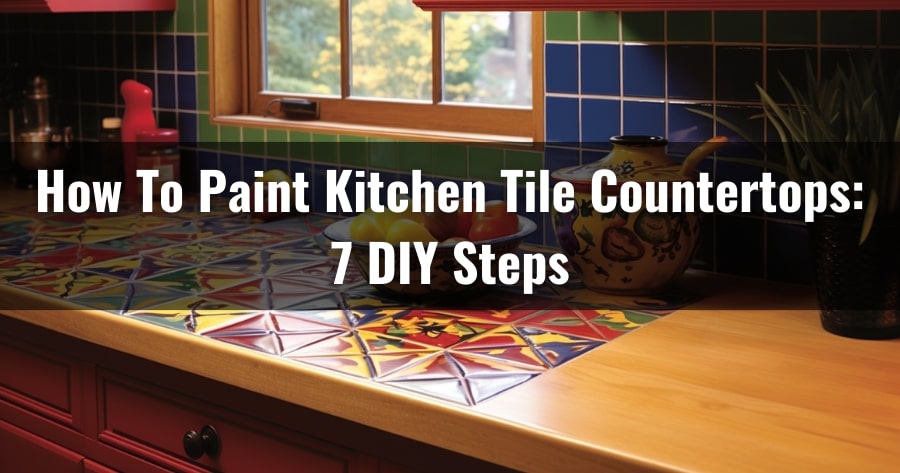
Transforming your old, faded kitchen tile countertops through the art of painting is an exciting venture. This promises a fresh and vibrant look for your culinary haven. While the prospect of a DIY project is enticing, the path to successfully painted countertops has potential pitfalls.
However, proper preparation is crucial before painting for a successful paint job on kitchen tile countertops. Aside from that, color testing should be done to avoid disappointment with the final color outcome.
Also, proper curing time should be allowed, and sealing the painted countertops after curing enhances durability.
In this guide, we will unravel the lesser-known intricacies of painting kitchen tile countertops, shedding light on five unique mistakes you should avoid. So, grab your paintbrush, and let’s get started.
Jump to Section
How To Paint Kitchen Tile Countertops: Steps to Follow
Ready to give your kitchen a fresh new look? Follow these simple steps to paint your kitchen tile countertops and transform your space.
- Evaluate suitability for painting
- Gather materials and equipment
- Cover and prepare the surface
- Apply primer and paint
- Accentuate grout lines (optional)
- Seal the painted surface
- Exercise caution after painting
Step 1: Evaluate Suitability for Painting
Before you start painting your kitchen tile countertops, assess their suitability for painting to ensure long-lasting and visually appealing results.
Take a close look at your countertops, paying special attention to high-traffic areas constantly exposed to moisture, such as near sinks. These areas may not be ideal locations for painting as they may not hold up well over time. However, if you use quality paint, you may also paint those areas.
Instead, focus on the countertops where the impact of painting can be both aesthetically pleasing and durable. Look for any cracks, chips, or other damage that may need to be repaired before painting.
Step 2: Gather Materials and Equipment
You must have the necessary tools to ensure a smooth and successful painting process.
- Start by putting on heavy-duty rubber gloves to protect your hands during the project.
- You’ll also need sandpaper with a grit of 120, which is recommended for preparing the surface.
- Painter’s tape will be handy for masking off any areas you don’t want to paint.
- For the actual painting process, make sure to have top-quality 100% acrylic semi-gloss primer and paint.
- Finally, don’t forget to gather brushes and rollers for applying the paint evenly.
These supplies, which cost an estimated $75 to $100, are essential for achieving professional-looking results.
Step 3: Cover and Prepare the Surface
Cover the surrounding areas with plastic or old sheets to prevent paint splatters and protect them from unintended paint splatters. This will prevent any mess and save you from the hassle of cleaning up later. Cover cabinets, appliances, and any other surface exposed to paint.
Next, use 120-grit sandpaper to sand the tile countertop. It will create a textured surface that allows the paint to adhere better. Be thorough, and make sure to sand all areas evenly.
After sanding, clean the surface with trisodium phosphate (TSP) to remove grease and grime. This is essential for avoiding a sticky surface and achieving a pristine canvas for your upcoming transformation.
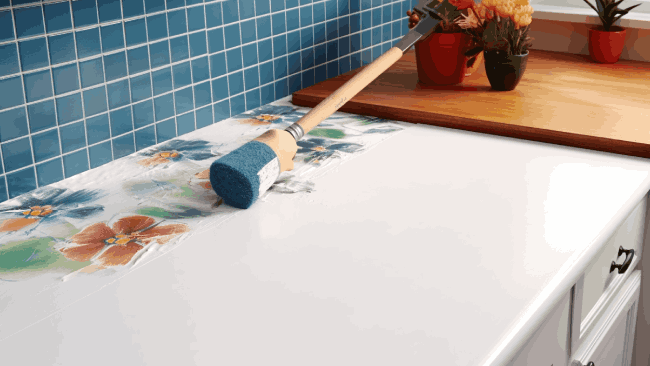
Step 4: Apply Primer and Paint
Now it’s time to dive into the exciting part: applying primer and paint to transform kitchen tile countertops.
To achieve the best results, thin the primer and paint before application. This will help with better coverage and a smoother finish. Start by applying several thin coats of primer, allowing sufficient drying time between each layer.
Once the primer is completely dry, it’s time to move on to the paint. Opt for top-quality 100 percent acrylic semi-gloss paint for a durable and attractive finish. Choose any color you desire to match your kitchen decor.
For added realism, consider painting the grout lines in contrasting colors. Take your time and be patient to ensure detailed and precise results.
Step 5: Accentuate Grout Lines (Optional)
When painting the kitchen tile countertops, consider enhancing the grout lines with a contrasting color. Accentuating the grout lines adds depth and dimension to your countertops and gives them a more realistic appearance.

This requires precision and patience, as you’ll need to carefully paint along the grout lines without getting any paint on the tiles themselves. To start, choose a color that contrasts with the main color of your countertops.
Using a small brush, carefully apply the contrasting color to the grout lines, making sure to stay within the lines. Take your time and be meticulous in your application to achieve a professional-looking finish.
Once the paint has dried, you can enjoy the enhanced grout lines that add a beautiful finishing touch to your painted kitchen tile countertops.
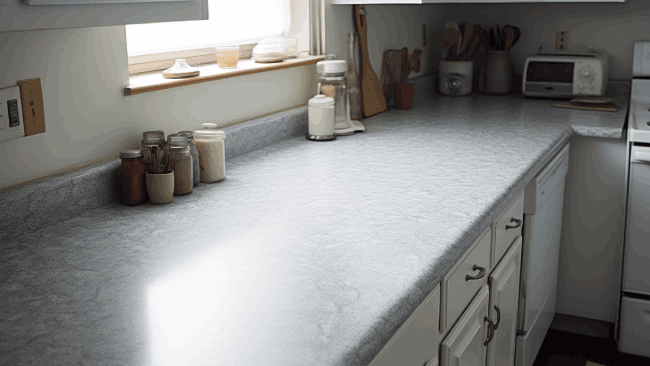
Step 6: Seal the Painted Surface
Seal the painted surface using a top-quality urethane finish to achieve a stunning and long-lasting finish on your painted kitchen tile countertops. This will enhance the appearance of your countertops and provide a protective layer that will prevent chipping, fading, and staining.
Use a high-quality brush or roller to apply the urethane finish. Follow the manufacturer’s instructions for proper application and drying time.
Allow the sealed surface to cure for at least two weeks before using your countertops to ensure maximum durability. This curing period is essential for the urethane finish to harden fully, providing a solid barrier against daily wear and tear.
Step 7: Exercise Caution After Painting
After sealing the painted surface of your kitchen tile countertops, exercise caution to ensure the longevity and pristine appearance of your newly painted countertops. To maintain the freshly painted look, you should take a few precautions:
- Always use cutting boards when preparing food on your countertops. This will prevent any accidental scratches or damage to the paint.
- Avoid placing hot pans or pots directly on the painted surface. The heat can cause the paint to peel or discolor.
- Promptly address any grout or tile repairs before painting. Any cracks or loose tiles should be fixed to create a smooth and durable surface for the paint.
Some Mistakes to Avoid When Painting Your Kitchen Tile Countertops
When painting your kitchen tile countertops, there are crucial mistakes you must avoid.
1. Neglecting Proper Preparation
Neglecting proper preparation is one of the most common mistakes people make when painting their kitchen tile countertops. The paint may not adhere properly to the surface without proper preparation, resulting in peeling or flaking.
2. Rushing the Painting Process
Don’t let the excitement of transforming your kitchen tile countertops lead you to rush through the painting process. While it’s understandable to be eager to see the final result, taking your time is crucial to achieving a professional-looking finish.
3. Underestimating Curing Time
One crucial mistake to avoid is underestimating the necessary curing time. Impatience can be the downfall of even the most meticulously painted kitchen tile countertops. The exact curing time will depend on the type of paint used and factors like temperature and humidity.
4. Overlooking Color Testing
Before painting your kitchen tile countertops, test the color first. While the color of the paint can look perfect, the result on your countertop might differ.
Color testing allows you to see the paint’s appearance on the tile surface before committing to the entire project. It involves applying a small amount of paint to an inconspicuous countertop area and allowing it to dry completely.
5. Forgetting the Backsplash
Don’t overlook the importance of including your backsplash in the painting process, as neglecting it can ruin your beautiful painted kitchen tile countertops.
Your countertop isn’t an isolated element; it’s part of a larger kitchen canvas. When you paint your countertops without considering the backsplash, you risk creating a visual disconnect.
FAQ’s: How To Paint Kitchen Tile Countertops
Is painting kitchen countertops a good idea?
Painting kitchen countertops is a cost-effective solution. Instead of investing in expensive new countertops, you can achieve a fresh and updated look by simply painting them.
The act of painting your countertops allows you to unleash your creativity. With a wide range of colors, textures, and finishes, your kitchen can be personalized to reflect your style.
However, painting kitchen countertops may not be suitable for all surfaces. While it works well on laminate or tile countertops, it may not adhere properly to surfaces like granite or marble.
What is the best color to paint kitchen countertops?
For timeless elegance, look no further than black for your painted kitchen countertops to add a touch of timeless elegance. Black is a classic choice that never goes out of style. It adds a sense of sophistication and luxury to any kitchen space.
One of the reasons why black is considered the most suitable color to paint kitchen tile countertops is because it works well with any design style. Whether your kitchen is modern, traditional, or eclectic, black countertops will seamlessly blend in and enhance the overall aesthetic.
What is the best primer for painting countertops?
The most recommended options for priming countertops are water-based acrylic or oil-based primers.
Water-based acrylic primers are popular for painting countertops, especially for materials like laminate or wooden countertops. These primers offer easy cleanup, fast drying, and low odor. They also adhere well to smooth surfaces, ensuring a strong bond between the primer and the countertop.
Conversely, oil-based primers are often recommended for countertops made of porous materials, such as concrete or natural stone. These primers have a longer drying time than water-based ones but offer superior adhesion and durability.
Conclusion
As you put the finishing touches on your newly painted kitchen tile countertops, anticipation fills the air. The transformation is almost complete, and you wonder how this bold color choice will bring your kitchen to life.
When you admire your freshly painted kitchen tile countertops, the results should testify to your meticulous planning and execution. By sidestepping the lesser-known mistakes outlined in this guide, you’ve paved the way for a transformation beyond aesthetics.
With each brush stroke, you’ve taken a leap of faith, and now it’s time to unveil your masterpiece. As the paint dries, the suspense builds, and you can’t wait to see a stunning and vibrant kitchen that reflects your unique style.