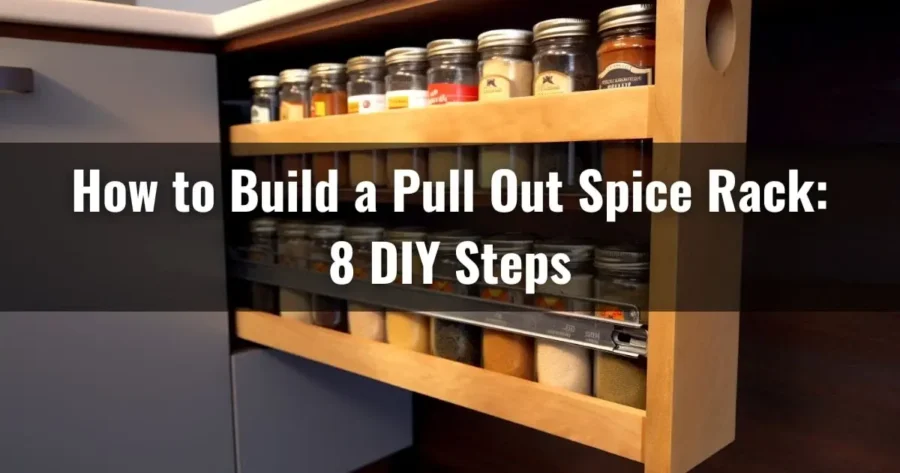
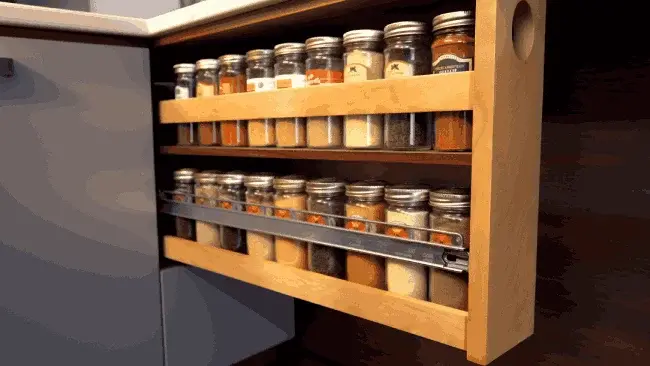
Building a pull-out spice rack is a practical and space-saving solution for organizing your kitchen spices and making them easily accessible. This DIY project can be customized to fit your kitchen cabinets and style preferences. With some steps, you’ll always be able to find your favorite seasonings again.
To construct a pull-out spice rack, measure the available space in your kitchen and the size of your spice jars. After that, design your spice rack accordingly, cut the wooden boards to the desired dimensions, and assemble the spice rack.
Today we’ll guide you through the process of creating your pull-out spice rack. Let’s turn your kitchen into a well-organized, spice-savvy paradise.
Jump to Section
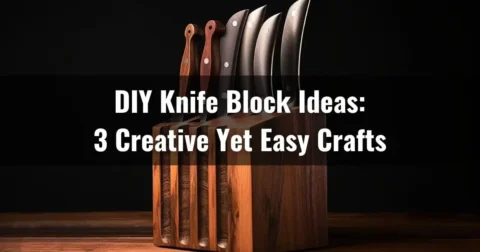
How to Build a Pull-Out Spice Rack in the Kitchen for Spice Organize: Steps to Follow
Follow a few simple steps to build a spice rack for your kitchen to organize spices.
Materials You’ll Need:
- Wooden Boards: You will need plywood or MDF (medium-density fiberboard) to construct the spice rack.
- Drawer Slides: Purchase high-quality drawer slides that can handle the weight of your spice rack and allow it to slide smoothly.
- Screws: Use wood screws of an appropriate size to secure the wooden components together.
- Wood Glue: To reinforce the joints and add stability.
- Circular Saw or Table Saw: To cut the wooden planks to the desired size.
- Drill and Drill Bits: To make holes for the screws.
- Screwdriver or Screw Gun: For attaching the drawer slides.
- Sandpaper: To smooth any rough edges and prepare the wood for finishing.
- Finishing Materials: Paint, stain, or varnish, depending on your preferred finish.
Step 1. Measure the Available Space and Jars You Have
You’ll need to measure the space in your kitchen carefully and the jars you have, ensuring they fit comfortably in the spice rack. Start by measuring the cabinet’s height, width, and depth or area where you plan to install the spice rack. This will help you determine the maximum dimensions for your sliding spice rack.
Next, measure the height and diameter of your spice jars or bottles. This will allow you to calculate the number of shelves you’ll need and their spacing. Remember that you’ll also need to account for the pull-out mechanism, so leave some extra space for that.
Step 2. Design Your Spice Rack
Now, take a moment to envision how you want your spice rack to look and function in your kitchen. Consider the number of shelves you’ll need based on the amount of spices you have. Think about whether you want the shelves to be adjustable or fixed.
Visualize the height and width of the spice containers you’ll use and ensure your design can accommodate them. Sketch out a frame that will fit inside your cabinet and determine the dimensions of each shelf. Leave enough space between the shelves for easy access to your spices.
Also, consider incorporating a lip or railing on the shelves to prevent the spice containers from falling off when the rack is pulled out.
Step 3. Cut the Wooden Boards
Using your circular saw or table saw, carefully cut the wooden boards into the necessary pieces for your pull out spice rack. Begin by cutting two equal-sized side panels, which should match the height of your cabinet and the depth of the spice rack.
Next, cut two equal-sized top and bottom panels, ensuring that their width is adjusted to accommodate the drawer slides by subtracting their width from the cabinet’s overall width. In the end, cut multiple shelves equal in size to the top and bottom panels. These shelves will provide storage space for your spices.
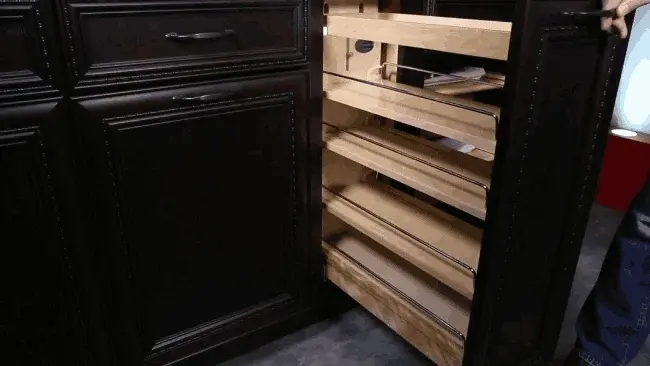
Step 4. Assemble the Spice Rack
Attach the side panels to the upper and lower panels using wood glue and screws. Make sure to apply the wood glue first to ensure a strong bond.
After that, insert the shelves evenly spaced inside the frame and secure them with wood glue and screws. Ensure the shelves are level to prevent spices from falling off. Make sure the glue dries completely.
Step 5. Sand and Finish the Spice Rack
Now sand the spice rack, ensuring that all rough edges and surfaces are smoothed, and then apply your chosen finish to complete the project.
Start gently using medium-grit sandpaper to sand the spice rack’s entire surface. Pay special attention to any rough spots or imperfections. Once the surface feels smooth, wipe away any dust with a clean cloth.
Following that, it’s time to apply your chosen finish. You can use a clear varnish or wood oil for a natural look. Consider using a wood stain or paint to add some color.
Apply the finish evenly using a brush or a cloth, following the manufacturer’s instructions. Allow the finish to dry completely before using the spice rack.
Step 6. Install Drawer Slides
Attach the drawer slides to the inside of your cabinet and make sure they’re level. Begin by positioning the slides on both sides of the cabinet, ensuring they’re parallel and evenly spaced. Use screws to secure the slides, ensuring they’re tightly fastened to provide stability.
Once the slides are securely attached, install the complementary set on the sides of the spice rack. Again, ensure that the slides are aligned with the ones in the cabinet.
Step 7. Mount the Spice Rack
To securely mount the spice rack, you’ll need to carefully position it and use screws to attach it to the installed drawer slides. Align the spice rack with the slides, ensuring it’s centered and level.
Once in position, secure the rack by driving screws through the pre-drilled holes on the sides of the rack and into the drawer slides. Make sure to use screws that are appropriate for the material of your cabinet and drawer slides.
After mounting the rack, test the pull-out mechanism to ensure it functions smoothly. If any adjustments are necessary, make them accordingly to ensure the rack slides in and out effortlessly.
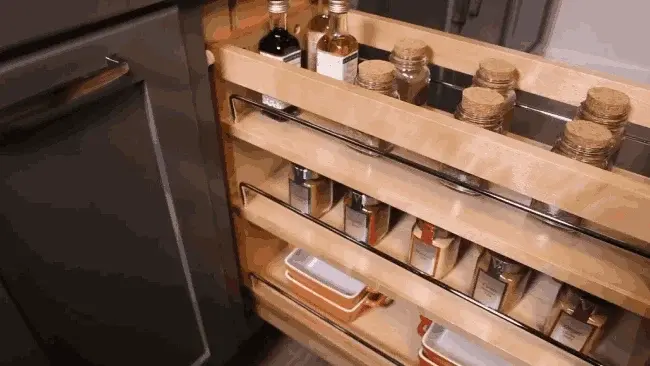
Step 8. Organize Your Spices
Once you have securely mounted your pull-out spice rack, it’s time to organize your spices. Start by taking all your spice jars or containers and placing them in front of you. Assess your collection and decide how you want to arrange them.
One option is to group them by type, such as herbs, spices, or blends. Another option is to organize them alphabetically or in order of frequency of use.
FAQ’s: How to Build a Pull Out Spice Rack
Why should I build a pull-out spice rack?
If you want to keep your spices organized and easily accessible while saving space in your kitchen, building a pull-out spice rack is a great idea. A dedicated space for your spices will eliminate the hassle of rummaging through cluttered cabinets or drawers.
With a pull-out spice rack, you can neatly arrange your spice bottles in an organized manner, making it easier to find the exact spice you need when cooking.
How wide should a pull-out spice rack be?
When building a pull-out spice rack, aim for a width of around 3 to 12 inches to ensure that it can accommodate a variety of spice bottles. This width provides enough space to hold standard-sized spice containers while keeping the rack slim enough to fit into narrow spaces.
A 9 to 12-inch width allows you to store multiple spice bottles side by side, making organizing and accessing your spices easier. It also ensures the bottles won’t be crowded, preventing them from tipping over or falling out when you pull out the rack.
What’s the best place to put drawer pulls on a pull-out spice rack?
When using pull-out spice racks, the placement of drawer pulls can vary based on personal preference and the design of your spice rack.
If you choose to place the drawer pulls in the middle, it can provide a balanced and symmetrical look to your spice rack. This placement allows easy access to the spices from both sides of the rack.
Conversely, placing the drawer pulls at the top or bottom of the spice rack can give it a sleek and modern appearance. This placement also ensures that the pulls don’t interfere with the spices or jars when pulling out the rack.
What are the benefits of adding caster wheels to the spice rack?
Adding caster wheels to the bottom of your spice rack allows you to move it in and out of your kitchen space easily. With the addition of caster wheels, you can effortlessly slide the spice rack to access your spices without any hassle.
The smooth accessibility lets you quickly find the spices you need while cooking, saving time and effort. Furthermore, caster wheels help prevent scuffing on your kitchen floor.
Conclusion
Building a pull-out spice rack can be a rewarding and practical addition to your kitchen. It organizes your spices conveniently, saves space, and makes your kitchen more functional.
Whether you choose a pull-out spice rack or a custom cabinet solution, you will be rewarded with a well-organized kitchen and pleasant aromas. So why wait? Roll up your sleeves, gather your tools, and begin this journey to culinary organization and efficiency.