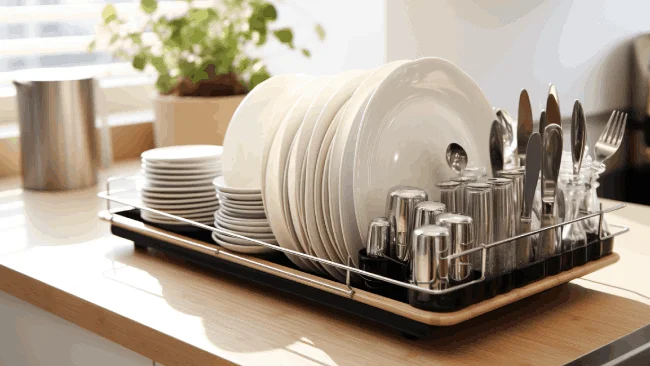
Cleaning a countertop dish drainer rack contributes significantly to both the appearance and the hygiene of your kitchen. A dirty dish drainer can not only be unsightly but can also harbor harmful bacteria that can spread to your dishes, utensils, and, ultimately to your food.
To clean a dish drainer rack on your countertop, you have to follow a few simple steps to ensure your drainer is clean and sanitized. You need to remove all dishes and utensils from the drainer to provide unobstructed access for the cleaning process.
In our research, we have found several effective cleaning solutions that you can use depending on your specific cleaning requirements. Soapy cleaning solutions and white vinegar are some examples of these solutions.
We will discuss all the steps with different solutions for effectively cleaning your dish drainer rack.
Jump to Section
How to Clean a Countertop Dish Drainer Rack: Step-By-Step Guide
You need to follow these steps for cleaning a countertop dish drainer rack:
- Step 1: Empty the dish drainer rack
- Step 2: Rinse off any loose food particles and debris
- Step 3: Prepare the cleaning solution
- Use soapy water (For regular cleaning):
- Use white vinegar application (For regular cleaning):
- Use baking soda (For managing messes and stains):
- Use a bleach solution (For pink mold issues):
- Step 4: Scrub the dish drainer rack
- Step 5: Rinse thoroughly and allow it to dry
Now we will discuss each step in detail so you can effectively clean your dish drainer rack.
Step 1: Empty the Dish Drainer Rack
To clean your dish drying rack, you need to empty it. Remove all dishes, utensils, and other items from the dish drainer rack. Place each dish and utensil in a separate area, such as the sink or a drying mat.
Step 2: Rinse off Any Loose Food Particles and Debris
Once you have cleared the dish drainer rack of all dishes and utensils, the next step is to rinse off any loose food particles and debris. To do this, simply place the rack under warm running water.
The warm water will help to loosen and remove any stubborn food particles that may be stuck on the rack. You can also use a soft brush or sponge to scrub away any remaining debris gently.
We encourage you to pay attention to the corners and crevices of the rack, as these areas tend to collect the most dirt and grime. Continue rinsing and scrubbing until the rack is free from any visible food particles or debris.
Step 3: Prepare the Cleaning Solution
Now, you need to prepare a suitable cleaning solution based on your specific cleaning needs. There are different cleaning solutions you can use depending on the type of dirt, stains, or mold present on your dish drainer rack.
Use Soapy Water (For Regular Cleaning)
A soapy water solution works well for regular cleaning. For cleaning your dish drainer rack, create a cleaning solution by filling a basin or sink with warm water and adding a few drops of mild dish soap.
Ensure the water is warm, as hot water can cause damage to the rack. The mild dish soap will help break down grease and grime, making removing it easier. Stir the solution gently to create a soapy mixture.
Use White Vinegar Application (For Regular Cleaning)
You can apply white vinegar to your dish drainer rack to enhance cleanliness and prevent mold and bacteria. Fill a spray bottle with white vinegar and mist the entire rack. Allow it to sit for a few minutes before continuing with the cleaning process.
White vinegar is known for its antibacterial properties and can help eliminate any lingering odors on your dish drainer rack. This is particularly effective for regular cleaning and maintenance.
Use Baking Soda (For Managing Messes and Stains)
Baking soda paste is an effective cleaning solution for managing messes and stains on your dish drying rack.
Create a paste by mixing baking soda with water. Apply the paste to any stained or odorous areas on the dish drainer and let it sit for a few minutes. The cleaning properties of the baking soda will work to remove stains and eliminate odors.
Use a Bleach Solution (For Pink Mold Issues)
To tackle pink mold issues on your dish drainer rack, prepare a bleach solution by mixing liquid bleach with water. This solution is effective in eliminating mold.

Our suggestion is that you work in a well-ventilated area and wear gloves to protect your hands. Mix one part liquid bleach with ten parts water and stir well.
Apply the bleach solution to the affected areas using a sponge or cloth, and let it sit for a few minutes before rinsing thoroughly with water.
Step 4: Scrub the Dish Drainer Rack
Once you have applied the appropriate cleaning solution, you need to scrub your countertop dish drainer rack. Grab a soft-bristle brush or sponge and scrub the rack’s entire surface. Pay extra attention to corners, joints, and any areas with visible stains or mold.
Use firm yet gentle strokes to remove any dirt, grime, or residue that may have accumulated on the rack. Be thorough in your scrubbing, ensuring that you cover all parts of the rack, including the bottom and sides.
If you encounter stubborn stains or mold, apply a bit more pressure and continue scrubbing until they’re completely removed.
Step 5: Rinse Thoroughly and Allow It to Dry
After scrubbing the dish drainer rack, rinse it thoroughly under running water to remove any cleaning solution residue. Make sure to rinse all areas of the rack, including the corners and crevices, to ensure no soap, vinegar, or bleach is left behind.
Running water will help to flush out any remaining residue and leave your dish drainer rack clean and ready to use. Let the rack air dry completely after rinsing in a well-ventilated area.
This will help prevent any moisture buildup and avoid mold or mildew growth. Once dry, your dish drainer rack will be ready to hold your freshly washed dishes.
How do you organize kitchen items on a countertop dishwasher rack?
After cleaning your countertop dish drainer rack, organizing your kitchen items efficiently is essential to make the most of the available space. Here are some tips for organizing kitchen items on a countertop dishwasher rack:
1. Sort and Arrange by Size and Type
To effectively organize your kitchen items on a countertop dishwasher rack, begin by sorting your washed dishes, utensils, and cookware by size and type. Separate plates from bowls, glasses from mugs, and utensils from larger items.
2. Place Larger Items on the Sides
Once you have sorted your kitchen items, it’s time to start arranging them on the dish drainer rack. As a rule of thumb, it is best to start by placing larger items like plates and cutting boards on the sides of the rack.
This way, you can ensure that these items will be stable and won’t topple over. Also, starting with larger items can prevent smaller items from getting trapped or hidden underneath them.
3. Nesting Bowls and Containers
If you have nesting bowls or containers, it’s a great idea to stack them neatly on the dish drainer rack to save space. When stacking, make sure to place the larger bowls at the bottom and the smaller ones on top.
In this way, you will be able to ensure that each bowl or container has sufficient space to drain efficiently. You can also prevent scratches and damage to your bowls and containers by stacking them neatly.
4. Utensil Holder Placement
When organizing your utensils on the dish drainer rack, it is essential to use the designated spaces for each utensil type.
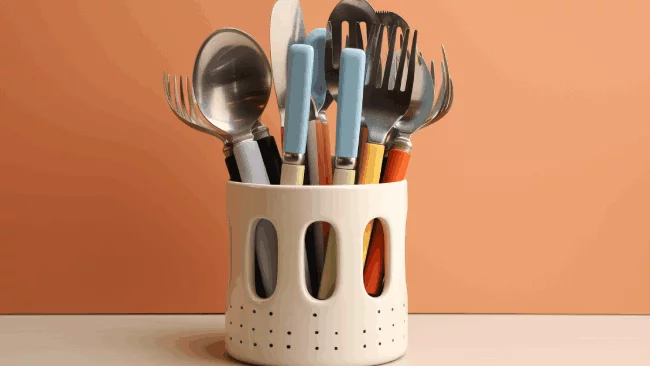
Generally, most dish drainer racks come with utensil holders, so make sure to place your cleaned utensils in their assigned sections. By separating your forks, knives, and spoons, you can quickly grab what you need when it’s time to put everything away.
5. Leave Space for Air Circulation
When organizing your kitchen items on a dish drainer rack, it is crucial to leave enough space for air circulation. This will allow for proper and efficient drying. As a result, you can prevent mold growth or unpleasant odors from developing.
By leaving enough space between your items, you can ensure that they won’t get wet or soggy due to improper draining. So, always make sure to leave enough space between your kitchen items, and your dish drainer rack will function efficiently.
FAQ’s: How to Clean a Countertop Dish Drainer Rack
We found some common questions that homeowners often ask about cleaning and organizing a dish drying rack. Here are the answers to those questions that may help you:
How often should you clean your countertop dish drainer rack?
A good rule of thumb to clean your dish drier rack is at least once a week. However, the frequency may vary depending on how often you use it and how dirty it gets.
If you notice any grime, stains, or unpleasant odors, it’s a sign that you should clean it more often to prevent the buildup of bacteria and mold. Taking the time to clean your dish drainer rack helps it last longer and ensures that your kitchen items dry in a clean and safe space.
Can you put your dish drainer rack in the dishwasher for cleaning?
You can wash your dish drainer rack in the dishwasher as long as it is confirmed to be dishwasher-safe by the manufacturer’s instructions.
Both plastic and metal dish racks are often designed to withstand dishwasher cleaning, making it a convenient and hygienic option. Simply include it in your regular dishwasher load to simplify the cleaning process and maintain the longevity of your dish drainer rack with minimal effort.
Conclusion
Keeping your countertop dish drainer rack clean is essential for maintaining a hygienic kitchen. Just a few simple steps, such as emptying the rack, rinsing off debris, and choosing the right cleaning solution, can make a significant difference.
Choose any of the effective cleaning solutions based on your specific needs, whether it’s soapy water for regular cleaning or white vinegar for an extra layer of cleanliness. Also, baking soda is used for managing messes and stains, or a bleach solution is used for tackling pink mold.
You can ensure a clean and sanitary dish drainer rack, contributing to a healthier kitchen environment and safer food preparation.