
A magnetic knife strip is a handy and efficient way to organize & store your kitchen knives and keep them easily accessible. However, installing one is a simple DIY project without special skills or tools. You can easily mount a stylish magnetic knife strip on your kitchen wall with the right equipment and some basic steps.
If you choose to drill, find a suitable location on the wall. Use a pencil to mark where the screws will go, and then drill pilot holes. Attach the magnetic strip using the screws provided.
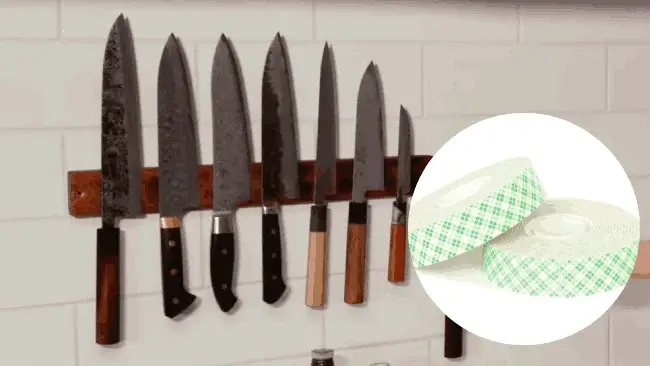
Alternatively, if you prefer not to drill, clean the wall surface and the back of the magnetic strip. Apply the mounting tape or adhesive strips to the back of the strip and firmly press it onto the wall. Allow it to set according to the manufacturer’s instructions before hanging your knives.
This step-by-step guide will discuss installing a magnetic knife strip on your kitchen wall. Let’s get started.
Jump to Section
How to Install Magnetic Knife Strip on a Kitchen Wall: Different Methods You Can Try

You have two options to install your magnetic knife strip on the kitchen wall:
Taking a closer look at each of these methods, let’s see how they work:
1. Drilling into the Wall
To install a magnetic knife strip on your kitchen wall by drilling, you’ll need to follow a few steps:
Tools and Materials You’ll Need:
- Magnetic knife strip
- Screws (usually provided with the strip)
- Wall anchors (if necessary)
- Screwdriver or drill with appropriate bits
- Level
- Pencil
- Measuring tape
Step 1: Choose the Installation Location
Choose an installation location that’s easily accessible, safe, and out of the way for your magnetic knife strip. Look for a spot near your work area where you can reach your knives easily.
Ensure the location is secure and stable, as you don’t want your knives falling off. Make sure the surface is clean and dry before installing the magnetic strip.
Step 2: Mark the Mounting Holes
Take your pencil and mark the locations of the mounting holes on the wall for your magnetic knife strip. Make sure to hold the strip against the wall at the desired height and ensure it’s level.
Use a pencil to mark the locations of the screw holes on the wall. Remember to use wall anchors for added support if you’re not mounting into studs. Place the anchors where you marked the holes.
Step 3: Pre-Drill Holes
Now, grab your drill and carefully pre-drill the holes for the wall anchors in the marked locations. Choose a drill bit that’s the appropriate size for your wall anchors.
Start by placing the drill bit in the center of the marked hole and applying gentle pressure. Slowly drill into the wall, careful not to apply too much force. Remove the drill bit once the hole is drilled, and proceed to the next marked location.
Step 4: Attach the Magnetic Strip
Align the magnetic strip with the screw holes and attach it to the wall using screws or wall anchors. If you’re mounting into wall studs, use a screwdriver or drill to drive the screws through the screw holes in the strip and into the studs.
For wall anchors, insert them into the pre-drilled holes first, then attach the magnetic strip using screws.
Step 5: Test and Tighten the Magnetic Hold
Once you’ve attached the magnetic strip to the wall, test and tighten the magnetic hold to ensure your knives are securely in place. Start by placing a knife on the strip and see if it holds firmly.
If it feels loose, you may need to tighten the screws on the strip. Continue testing with other knives to ensure a strong and secure hold.
2. With Mounting Tape or Adhesive strips
To install a magnetic knife strip on your kitchen wall using mounting tape or adhesive strips, follow these steps:
Tools and Materials You’ll Need:
- Magnetic knife strip
- Adhesive strips or adhesive mounting tape
- Level
- Pencil
- Measuring tape
- Cleaning supplies (rubbing alcohol or similar)
Step 1. Choose a Location to Install
You should consider the height and accessibility when choosing where to install your magnetic knife strip in the kitchen. Find a location that’s easily accessible while you’re working but out of reach of children.
Ensure it isn’t near any electrical outlets, switches, or plumbing. Also, consider the height you want the knives to be within easy reach.
Step 2. Clean the Wall Properly
Before installing, thoroughly clean the wall with rubbing alcohol or a similar cleaning solution. Start by pouring a small amount of rubbing alcohol onto a clean cloth. Gently wipe the chosen wall area, removing dirt, dust, or grease. Allow the wall to dry completely before moving on to the next step.
Step 3. Measure and Mark the Area
Measure the area carefully, and then mark it with a pencil. Start using a measuring tape to find the center of the wall where you want to install the magnetic knife strip.
Once you’ve found the center, lightly mark it with a pencil. This will serve as your guide when installing the strip. Take accurate measurements to ensure the strip is positioned correctly on the wall.
Step 4. Position the Knife Strip
Once you have marked the area, carefully position the knife strip against the wall. Align the center of the strip with the mark you made. Use a level to ensure that the strip is perfectly horizontal.
Ensure the strip’s top and bottom align with your additional marks. This will indicate where the strip will be placed. Take your time to verify the strip is placed correctly before continuing.
Step 5. Apply the Tape or Adhesive Strips
You’ll need to carefully apply the adhesive strips or mounting tape to the back of the knife strip and firmly press them onto the wall. Start by removing the protective backing from the adhesive side of the strips. Make sure to position the strip at the desired location on the wall, ensuring it’s level.
Step 6. Press and Hold the Tape
To ensure a secure bond, firmly press and hold the tape against the wall for the recommended time. Apply pressure for about 30 seconds to allow the adhesive strip to bond with the wall fully.
This process is crucial to ensuring the magnetic knife strip stays secure. Remember to follow the manufacturer’s recommended curing time, typically 24 hours, to achieve maximum holding strength.
Step 7. Test and Place the Magnetic Knife Strip
Now, grab a few knives and test the magnetic knife strip by placing them on it to ensure it’s securely mounted. Gently place the knives, one at a time, on the strip.
If the strip is properly installed, the knives should stick to it securely. Give the knives a slight tug to ensure they don’t fall off. If they stay in place, your magnetic knife strip is ready to use.
FAQ’s: How to Install Magnetic Knife Strip on the Kitchen Wall
How do you properly store knives on a magnetic knife strip?
A magnetic knife strip is an excellent tool in your kitchen, but you must use it correctly to protect your investments.

When placing a knife onto the strip, remember to start with the blunt back of the blade touching the magnet. This small step can greatly reduce the risk of damaging the sharp edge.
Should knives point up or down on the magnetic strip?
When organizing your knives on a magnetic strip, always point them up to avoid accidental cuts. This way, when you reach for a knife, there’s no danger of rubbing your hand over an edge or into the point.
What Mounting tape is best for magnetic knife strip installation?
You should consider using heavy-duty double-sided tape, such as Gorilla Grip or 3M, to install your magnetic knife strip. This type of tape is designed to provide a strong and secure hold, ensuring your knife strip stays on the wall.
Conclusion
Installing a magnetic knife strip on your kitchen wall is a convenient and space-saving solution for storing your knives. Not only does it keep your knives within easy reach, but it also helps to keep them organized and protected.
Whether you opt for screws and anchors or adhesive strips and mounting tape, the process is straightforward and quick. Follow our step-by-step instructions, and you’ll have a sleek and functional magnetic knife strip installed on your kitchen wall in less than an hour.
So, give your kitchen a sleek and practical upgrade with a magnetic knife strip.