A well-organized and functional kitchen pantry is a dream for any home cook or culinary enthusiast. In a pantry, food items, kitchen essentials, and supplies can be stored conveniently to streamline the cooking process. Also, it adds a touch of elegance to your kitchen. But how do you make one?
To make a pantry cupboard for your kitchen, start by measuring and marking the dimensions of the cupboard on the wall where you want it to be installed. Then, cut and assemble the cupboard frame using plywood or MDF boards.
Next, add shelves and dividers according to your storage needs. After that, install doors and handles to give your pantry cupboard a finished look. Finally, paint or stain the finished cupboard to match your kitchen decor.
Here, we will take you through the process of making a pantry cupboard for your kitchen. Aside from that, we will share tips on organizing and cleaning pantry cupboards to maximize their potential.
Step-By-Step Instructions on How Do You Make a Pantry Cupboard for Kitchen
When talking about making a pantry cupboard for the kitchen, you must decide whether to build it from scratch or buy a pre-made one.
If you’re up for the challenge, building your own pantry cupboard is often the best option, as it allows you to customize the size and design according to your needs.
Here are the steps:
- Step 01: Measuring and marking the dimensions of the cupboard
- Step 02: Cutting and assembling the frame of the cupboard
- Step 03: Adding shelves and dividers
- Step 04: Installing doors and handles
- Step 05: Painting or staining the finished cupboard
Step 01: Measuring and Marking the Dimensions of the Cupboard
a. Measure the Space
Start by grabbing a tape measure and getting up close with the nooks and crannies in your kitchen. Capture accurate measurements of the height, width, and depth available for your soon-to-be pantry cupboard.
Measure from the floor to the ceiling, across the walls, and from any surrounding objects that may affect the dimensions. We recommend writing down these measurements as they will be crucial in designing and building your pantry cupboard.
b. Design the Layout
- Envision the ideal arrangement for your pantry shelves and dividers, considering how you want to organize your items for easy access.
- Determine the number of shelves based on the height of your items and leave enough space in between for taller items.
- Consider adding dividers to separate different categories of items.
- Next, decide the door size based on the pantry cupboard’s dimensions.
- Sketch out a rough layout that incorporates these elements for a functional and organized pantry cupboard design.
c. Mark the Dimensions
Grab a pencil, straight edge, and measuring tape, and get ready to mark all the required pieces precisely. Use a steady hand and take your time to ensure accurate dimensions for each piece. We prefer to double-check your measurements before moving forward.
Step 02: Cutting and Assemble the Frame of the Cupboard
a. Gather Materials
Now, let’s gather all the tools and materials you’ll need to create your own stylish pantry cupboard for your kitchen.
Purchase plywood or medium-density fiberboard (MDF) for the frame, screws, wood glue, and a circular saw or table saw. These materials are essential for cutting and assembling the cupboard frame.
b. Cut the Pieces
Using the marked dimensions as a guide, start by cutting the pieces for the cupboard frame’s sides, top, bottom, and back.
Make sure to measure accurately and use a straight edge for clean cuts. Aside from that, cut extra pieces for shelves and dividers as needed.
c. Assemble the Frame
To assemble the frame for the cupboard, follow these steps:
- Attach the sides and top/bottom pieces together using wood glue and screws. This will create a sturdy frame for the cupboard.
- Use clamps to hold everything in place while the glue dries. This will help ensure that the pieces are securely joined together.
- Once the glue has dried and the frame is secure, reinforce the joints by driving screws through each corner.
Step 03: Adding Shelves and Dividers
To add shelves and dividers to your pantry cupboard, follow these steps:
- Start by installing shelf supports at the desired heights. Use a level to ensure the supports are straight and evenly spaced.
- Once the supports are in place, simply insert the shelves and dividers into their respective slots.
- Make sure they fit snugly and securely before moving on to the next step of building your kitchen pantry cupboard.
Step 04: Installing Doors and Handles
a. Choose the Door Style
Consider swinging doors for a classic look or sliding doors for a modern touch. If you want to showcase the contents of your pantry, glass doors are a great option. Whatever style you choose, make sure it complements the overall design of your kitchen and enhances the functionality of your pantry cupboard.
b. Cut and Mount the Doors
Begin by cutting the plywood or MDF pieces according to your design. Make sure they are measured accurately and smoothly cut.
Once you have your doors ready, attach hinges to them. Carefully aligning the hinges properly so that the doors open and close smoothly. Then, mount the doors onto the cupboard frame using screws or nails for a secure fit.
c. Add Handles or Knobs
Start by determining the ideal placement for the handles or knobs on your pantry cupboard doors. We suggest considering ergonomics and ease of grip when choosing the location.
Once you have decided on the perfect spot, use a drill to create holes for attaching the handles securely. Make sure they are aligned properly and tighten them firmly.
Step 05: Painting or Staining the Finished Cupboard
a. Sand the Surfaces
Smooth out the surfaces of your pantry cupboard by sanding them thoroughly. This will ensure a flawless finish for your kitchen project.
Use sandpaper to sand the entire surface of the cupboard gently. Make sure to cover all areas evenly. This will help create a clean and polished look that will enhance the overall appearance of your pantry cupboard.
b. Apply Primer (Optional)
Applying a primer will help create a smooth surface that allows the paint to adhere properly and prevents any discoloration or bleeding. It also helps hide imperfections on the surface, ensuring a professional-looking result.
To apply the primer, use a brush or roller to coat the cupboard evenly. Let it dry completely before continuing.
c. Paint or Stain
Choose your preferred paint or stain color and apply it to the surface, covering every corner and edge. Allow each coat to fully dry before applying the next one, as multiple coats may be needed for the desired color and finish.
d. Seal the Finish (Optional)
We also encourage you to consider applying a clear sealant for added protection and a stunning finish to bring out the beauty of your newly stained or painted piece. Sealants not only help to protect the wood from moisture, stains, and scratches, but they also enhance its appearance.
To seal the wood, brush or roll an even sealant layer over the surface. Allow it to dry completely before using your cupboard or other furniture.
How Do You Organize and Optimize Your Kitchen Pantry Cupboards?
When organizing and optimizing your kitchen pantry cupboards, there are three key points you should focus on.
- Step 01: Sorting and categorizing Pantry items
- Step 02: Utilizing storage solutions
- Step 03: Labeling and maintaining a system
Step 01: Sorting and Categorizing Pantry Items
Start by taking everything out of your pantry cupboard and feel the satisfaction of decluttering as you discard expired items and donate those you no longer need. This will create space for what truly matters in your kitchen.
Group similar items together to make finding them easier. Common categories include Grains, Pasta, Canned goods, Sauces, Condiments, Snacks, Baking supplies and Spices. Consider your cooking habits and group items accordingly.
Step 02: Utilizing Storage Solutions
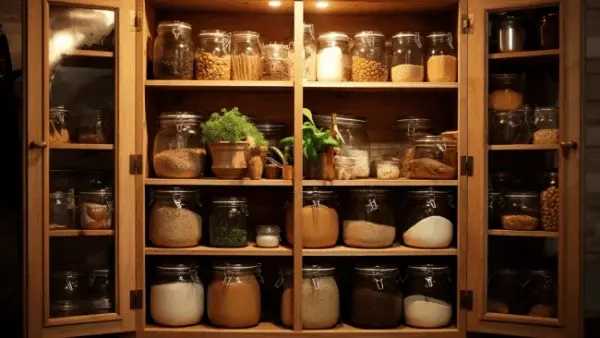
We suggest you utilize clear, stackable bins and baskets to effortlessly organize and visually display your pantry items, making it a breeze to find what you need. Group similar items together in different bins, such as baking supplies, snacks, and canned goods.
Use airtight containers to store loose items like pasta, rice, cereals, and snacks to keep them fresh and maintain a neat appearance.
Step 03: Labeling and Maintaining a System
You need to label and maintain a system to keep your pantry functional and efficient. By using label stickers or tags on bins, baskets, and containers, you can ensure that everyone in the household knows where things belong.
Also, practicing First In, First Out (FIFO) ensures that items are used before expiration and prevents waste.
How Do You Keep Your Kitchen Pantry Cupboard Clean?
Following a few key tips is essential to maintain a clean pantry cupboard.
- Tips #1: Clean and declutter regularly
- Tips #2: Checking for any repairs or replacements needed
- Tips #3: Reorganizing and adjusting shelves as needed
Tips #1: Clean and Declutter Regularly
Keep your pantry cupboard in tip-top shape by regularly cleaning it using liquid dish soap and warm water. This will ensure a fresh and organized space that will make you feel proud and inspired in the kitchen.
It’s advisable to clean the shelves every month by removing all items from the shelves and wiping them down. Remember to check for spills or stains and clean them promptly. Take this opportunity to discard expired or unused items. Also, consider donating unopened, non-expired ones to local food banks.
Tips #2: Checking for Any Repairs or Replacements Needed
Regularly inspecting your pantry cupboard for any signs of wear and tear will ensure its longevity and functionality. Start by checking for loose or damaged hinges, handles, or shelves. If you notice any issues, address them promptly to prevent further damage.
Tips #3: Reorganizing and Adjusting Shelves as Needed
Consider the size and shape of the items you frequently store and adjust shelf heights accordingly. Use storage containers or bins to group similar items together, maximizing space.
Labeling containers will make it easy to identify their contents. Regularly reorganizing will help maintain a well-organized pantry, making it easier to find what you need.
FAQ’s: How to Make a Pantry Cupboard
During our extensive research, we collected a few common questions about pantry organization:
1. Is 3 feet wide enough for a pantry?
3 feet wide is definitely enough for a pantry cupboard in your kitchen.
By maintaining a width of at least 3 feet, you ensure that there is ample room to store your kitchen essentials. This size allows for easy access and organization while maximizing storage capacity in a limited space.
2. How much does it cost to build a hidden pantry?
Building a hidden pantry cupboard in your kitchen can range from $750 to $3,500, including materials, labor, and any additional features you may want to incorporate.
Hidden pantries are typically built into existing cabinets or walls and can be customized to fit your specific needs. Factors such as size, materials used, and design complexity will impact the overall cost of building a hidden pantry for your kitchen.
3. Why are pantry cabinets so expensive?
Kitchen pantry cabinets can be quite expensive for several reasons.
They require intricate craftsmanship and expertise to create, resulting in exquisite designs that leave you in awe. Despite manufacturing equipment and technology availability, most kitchen pantry cabinet designs still require hours of hands-on work.
This means that you are not only paying for the materials used but also for the labor and expertise of the craftsmen involved in building these cabinets.
4. Can you build a pantry cupboard cheaper than buying one?
Building your own pantry cupboard can be a cost-effective alternative to purchasing one. Still, you should consider all factors before deciding whether it is cheaper than buying one.
While it may seem like a great way to save money, the reality is that the cost of tools and time can significantly eat into your savings. This is especially true if you’re not an experienced woodworker.
On the other hand, buying a pantry cupboard eliminates the need for tools and the time commitment of building one yourself. You can simply shop around for the best deal and have it delivered to your home.
Conclusion
Creating a pantry cupboard for your kitchen is a practical and efficient way to organize and optimize your space. Following the step-by-step instructions, you can easily build a functional pantry cupboard that meets your needs.
Keeping your pantry cupboard clean is essential for maintaining food safety and preventing pests. With these tips and techniques, you can ensure that your kitchen pantry cupboard remains tidy and well-maintained.
Remember to regularly declutter, label items, and establish a cleaning routine to keep everything in order.