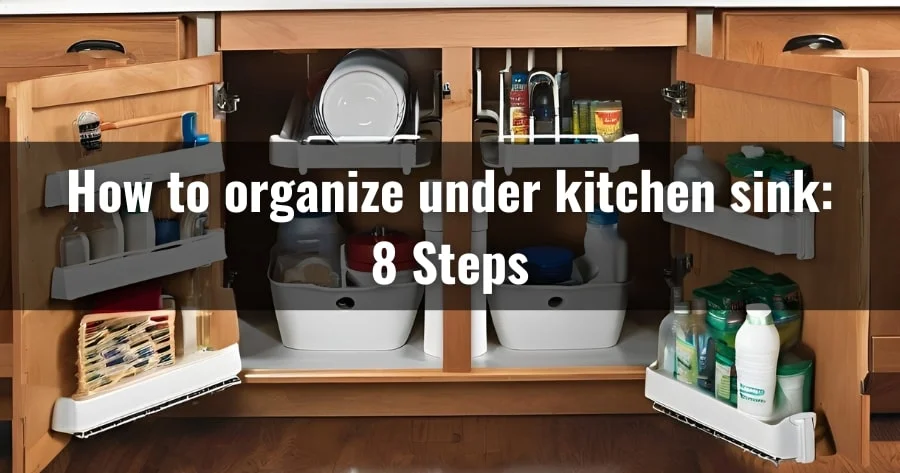
If you’re like many of us, the cabinet under the kitchen sink can quickly become a black hole of miscellaneous cleaning supplies, misplaced brushes, and random scrubbers. It’s an area that easily gathers clutter because of its out-of-sight nature.
But what if I told you that you could turn this chaotic space into an efficient, organized haven in just 8 simple steps? Today, I’m going to walk you through the process of transforming this often-overlooked area into a well-organized and functional space that you’ll love.
Step-by-Step Guide: How to organize under kitchen sink
Organizing the cabinet under the kitchen sink doesn’t have to be daunting. I’ve broken down the process into 8 manageable steps, so you can tackle this organization project efficiently.
Materials Needed
- Measuring tape
- Gloves
- Clear bins
- Shelf liner
- Stackable bins
- Over-the-door organizers
- Lazy Susan
- Command hooks
Step 1: Empty the Cabinet
The first step is to completely empty the cabinet under the kitchen sink. Take out all the items and lay them out on your kitchen floor or counter. This will give you a clear view of everything you have stored in this space.
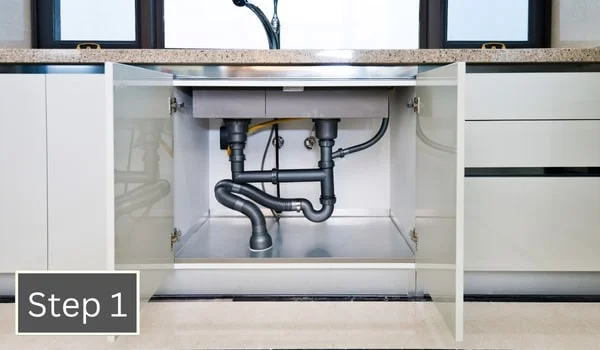
Now is the perfect time to put on your gloves and wipe down the inside of the cabinet with a cleaner. It’s amazing how much dust, grime, and spill residue can accumulate in this area. Ensure that you give the surfaces a thorough cleaning.
Pro Tip: Use a cleaner that is safe for wood or the specific material of your cabinet. Avoid dousing the area with water, especially if you have pipes or plumbing fixtures that could rust or corrode over time.
Step 2: Measure the Space
With the cabinet empty, grab your measuring tape and measure the dimensions of the inside space. Take note of the height, width, and depth of the cabinet. This will be crucial when selecting your storage solutions like bins, caddies, and stackable containers.

Pro Tip: Measure twice to ensure accuracy. Knowing the exact depth of the cabinet can help you avoid buying organizers that won’t fit properly.
Step 3: Apply Shelf Liner
Applying a shelf liner will not only protect the bottom of your cabinet but also make it easier to clean up any spills in the future. Choose a liner that is waterproof and easy to install. Cut it to size based on your measurements and lay it down evenly in the cabinet.

Pro Tip: Look for shelf liners with adhesive backing to keep them securely in place and prevent them from bunching up over time.
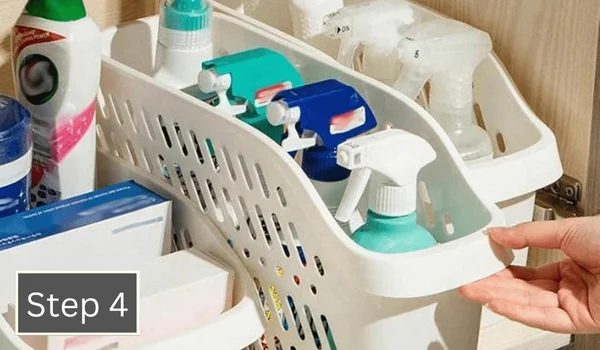
Step 4: Group Similar Items Together
Next, group your items into categories. Common categories include cleaning supplies, sponges, brushes, and garbage bags. By sorting your items, you’ll make it easier to find what you need quickly and efficiently.
Pro Tip: If you find items you no longer need or use, consider donating them or throwing them out to reduce clutter.
Step 5: Choose the Right Storage Solutions
Based on your measurements and item groups, it’s time to choose the right storage solutions. Clear bins are excellent for visibility, and stackable bins maximize vertical space. Over-the-door organizers are perfect for storing larger items like spray bottles.
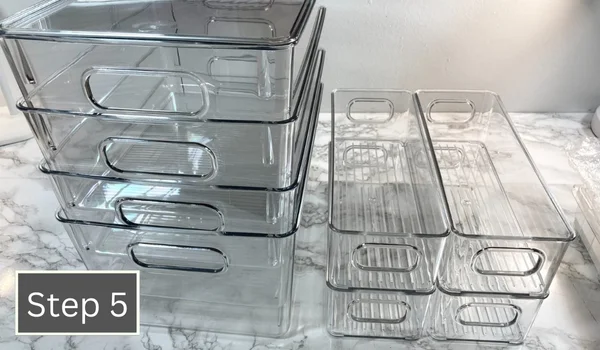
Pro Tip: Opt for transparent or labeled bins to easily identify the contents without having to open each one.
Step 6: Utilize Command Hooks and Lazy Susans
Command hooks are fantastic for hanging smaller items like brushes and sponges on the inside of cabinet doors. A Lazy Susan can be placed at the back of the cabinet to hold cleaning supplies, making it easier to access items stored deeper in the cabinet.

Pro Tip: Ensure that the Command hooks are properly adhered for maximum strength and longevity.
Step 7: Place the Items Back in the Cabinet
Now that you have all your storage solutions in place, it’s time to put your items back in the cabinet. Make sure to place frequently-used items in the most accessible spots. Keep rarely used items toward the back or higher up.
Pro Tip: Test out different configurations to find the most efficient layout before finalizing the placement of your items.
Step 8: Regular Maintenance
Finally, establish a regular maintenance routine. Schedule a monthly check to declutter and clean the cabinet under the kitchen sink. Periodic maintenance will ensure that your organization efforts last long-term.
Pro Tip: Keep a small cloth and multi-surface cleaner near the sink to quickly address spills and messes as they happen.
What To Consider Before Organizing Under Kitchen sink
Before diving into this sink organization project, it’s important to consider a few key factors to ensure a smooth process.
Safety
Safety should always be a priority, especially when dealing with cleaning supplies and potentially hazardous materials.
- Wear gloves to protect your hands from harsh chemicals.
- Make sure the area is well-ventilated if you’re using strong cleaners.
- Ensure that any pipe maintenance or plumbing work is completed to prevent leaks or water damage.
- If you have young children, consider child-proofing the cabinet.
Remember, taking these safety measures can prevent accidents and ensure a seamless organization experience.
Expertise Matters: Hiring Professionals
If the thought of organizing your under kitchen sink cabinet is overwhelming, or if you have never done such a task before, it’s perfectly okay to hire a professional organizer. Professionals have the expertise and experience to maximize your space efficiently while addressing any unique challenges your kitchen sink cabinet may present.
Hiring a professional ensures that your under-sink area will not only be organized but also optimized for long-term use.
Recommended Kitchen Sink Organizers
Choosing the right organizers can make a world of difference. Here are some highly recommended products:
- The Container Store Clear Bins: Ideal for visibility and stackability.
- Amazon Silicone Trays: Great for catching drips and easy to clean.
- Over-the-Door Rack: Perfect for maximizing the door space.
Investing in good-quality organizers will set you up for long-term success in maintaining an organized space.
Additional Considerations: Essential Insights
Here are a few more critical considerations to keep in mind when organizing the cabinet under your kitchen sink. These insights are based on my extensive experience in kitchen organization projects.
Product Quality and Durability
Always choose high-quality storage solutions. Durable products will stand the test of time and withstand the wear and tear of daily usage.
Space Optimization
Maximize your available space by utilizing vertical storage. Stackable bins, tiered trays, and hanging caddies can significantly increase storage space.
Customization Options
Customize your storage solutions to fit your needs. For example, adjustable shelves can be altered as your storage requirements change over time.
Tips: Organization Hacks for Under Kitchen Sink
In addition to the step-by-step guide, here are some extra organization hacks to help you keep your under-sink space in top shape.
- Use tension rods to hang spray bottles above other stored items.
- Install small shelves or racks on the inside of cabinet doors for extra storage.
- Opt for collapsible bins to create more room when needed.
- Consider using waterproof bins for storing liquid-based products to contain spills.
Implementing these tips can further optimize your organization project and make your kitchen sink cabinet an area of efficiency and order.
Conclusion
Take the first step today to achieve a neat and tidy under-sink cabinet. You’ll not only save time and stress but also create a more functional kitchen space. Don’t forget to subscribe to our newsletter, follow us on social media, and check out related articles for more tips on keeping your kitchen organized.
FAQ’s
How can I maximize space under my kitchen sink?
To maximize space under your kitchen sink, consider incorporating a variety of storage solutions like a lazy susan for easy access to cleaning supplies, stackable bins, and using the vertical space by installing a shelf or a tension rod to hang spray bottles.
What are some ideas for organizing cleaning supplies under the sink?
Use clear bins to categorize and store different cleaning supplies. Small baskets or a drawer organizer can help keep items like sponges, brushes, and scrub brushes neatly contained. Affixing hooks inside the cabinet doors also provides additional storage for brushes and cloths.
How do I deal with the garbage disposal and pipe when organizing under the sink?
When organizing under the kitchen sink, work around the garbage disposal and pipe by utilizing smaller storage bins that fit around these obstacles. Consider using a flexible shelf solution that can adjust around pipes, providing extra storage space.
Are there affordable ways to organize the cabinet under the kitchen sink?
Yes, affordable options include purchasing organizational items from a dollar store. These stores often have bins, hooks, and other storage solutions that can help you organize the cabinet without breaking the bank.
What can I do to keep my kitchen sink organization consistent?
Labeling your storage solutions helps maintain a consistent kitchen sink organization. Regularly decluttering and ensuring that each item has a designated place will also keep your space organized over time. Use a set of 3 clear bins to store cleaning products and make sure to return items to their designated spots after each use.
How can I store dishwashing tools effectively under the sink?
Use a small caddy or bin to store dishwashing essentials like sponge, scrub brushes, and dishwasher tablets. Consider using a magnetic strip on the cabinet door to hold dishwashing gloves or a small container for dishwashing liquid and hand soap.
What’s the best way to store extra trash bags under the sink?
To store extra trash bags, use a simple dispenser or a container that allows you to pull one bag at a time. Hanging a hook or a small basket on the cabinet door can also provide a convenient way to store trash bags while saving space inside the cabinet.