
Storing and managing your garden harvest correctly in your kitchen will help preserve the freshness and quality of your homegrown produce.
You have to follow some systematic steps for storing and managing your garden produce. This involves inspecting, cleaning, preserving, labeling, and organizing your harvest effectively.
Inspecting each item meticulously allows you to identify the damaged or overripe ones, ensuring that only the best-quality fruits and vegetables make it to your storage. Categorizing them further streamlines the process and aids in efficient meal planning.
We will discuss how to store and manage your garden harvest effectively so you can enjoy it throughout the year without any spoilage.
Jump to Section
Storing and Managing Garden Harvest in Your Kitchen: Step-By-Step Guide
To correctly store and manage your garden harvest in your kitchen, follow these six simple steps:
Step 1: Collect and Bring the Garden Harvest Into Your Kitchen
As you gather the bountiful fruits and vegetables from your garden, swiftly bring them indoors to maintain optimal freshness and control over the ripening process. Doing so can prevent overripening and ensure your harvest stays in its prime condition.
For items that are picked too soon, consider placing them in a sunny spot to finish the ripening process.
Avoid leaving your harvest outside for extended periods, as exposure to heat and sunlight can cause spoilage. Instead, bring them indoors as soon as possible, where you can properly store and manage them.
Step 2: Inspect and Categorize the Items
Inspect and categorize each item carefully after swiftly bringing your garden harvest into your kitchen to maintain optimal freshness.
Start by examining the condition of the fruits and vegetables, looking for any signs of damage, bruising, or disease. For leafy greens, check for wilted or discolored leaves. Sorting your harvest based on its condition is crucial for maintaining the overall quality of your stored produce.
As you inspect, categorize the items into groups. Separate fruits from vegetables and distinguish between root vegetables and leafy greens. This categorization will help you organize your storage and plan your meals effectively.
Step 3: Clean the Garden Harvest Items
To ensure the cleanliness of your garden harvest items, you need to thoroughly clean them before deciding on preservation methods. You can remove dirt with a quick cold water bath for items you plan to use within a week.
However, we suggest that if you intend to use other preservation methods, it’s best to avoid washing them to prevent premature rot. Instead, you should manually remove any visible dirt or use a dry brush. This approach minimizes unnecessary moisture, which can lead to spoilage.
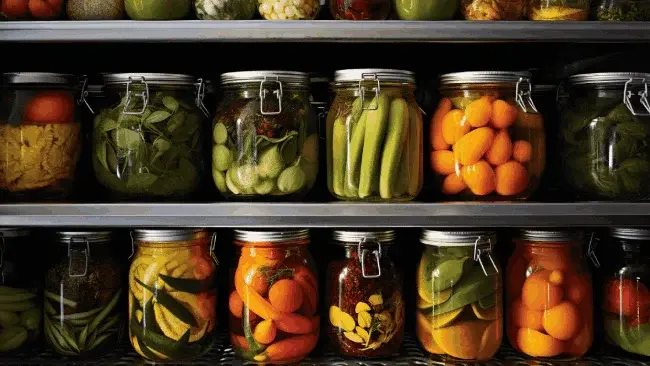
Step 4: Determine Preservation Methods and Select Suitable Storage Options
Once you have cleaned your garden harvest items thoroughly, determine the most suitable preservation methods and storage options for each type of produce. You can choose from various methods, such as refrigeration, freezing, canning, pickling, and dehydrating.
Refrigeration is ideal for fruits and vegetables, especially when stored in crisper drawers for added humidity. Freezing works well for berries, leafy greens, and surplus harvests; remember to blanch vegetables before freezing and label your containers.
Canning is a classic method for making jams, jellies, and sauces; sterilize jars, follow processing times, and check for proper seals. Dehydration is a great option for tomatoes, peppers, apples, and herbs; use a dehydrator or sun-drying and store in airtight containers.
Pickling is excellent for cucumbers, beets, and excess produce; ensure items are fully submerged in brine. Consider blending leafy greens with water and freezing them into cubes for convenient dish additions.
Step 5: Clearly Label Each Container or Bag
Labeling each container or bag assists in effectively storing and managing your garden harvest in the kitchen. It ensures that you can easily identify and retrieve specific items later on.
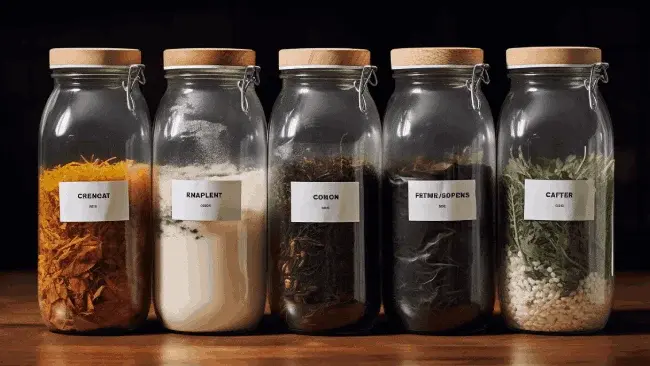
To do this, use waterproof and durable labels or markers to prevent smudging or fading. Include important information like the type of produce, harvest date, and any specific notes about ripeness or special considerations. If you’re using different preservation methods, mention it on the label.
Clear and concise handwriting or printing enhances readability, especially if you plan to share or donate your harvest. Consider using color-coded labels or stickers for quick visual identification, particularly if you have various fruits and vegetables.
Taking the time to label each container thoughtfully contributes to an organized and efficient system that makes meal preparation and consumption seamless.
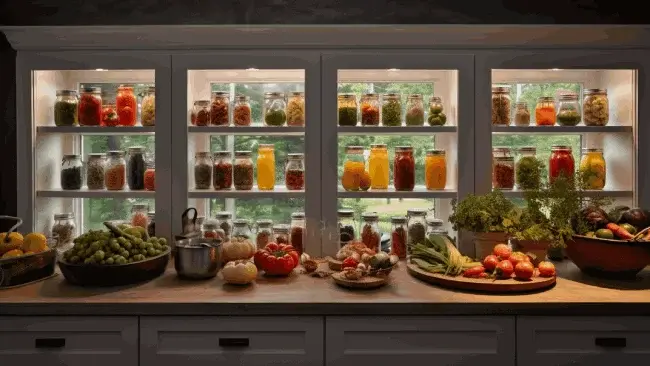
Step 6: Organize the Stored Garden Harvest Systematically
To create an organized system for storing your preserved garden harvest, you must consider the storage requirements and group similar items together.
In the refrigerator, separate vegetables and fruits and group them based on their moisture needs. This will help maintain their freshness and prevent spoilage.
For frozen items, organize containers by type and date to simplify retrieval. Consider allocating a designated freezer section for frozen bags or containers, keeping items together for easy meal planning.
Arrange canned goods by type and date, grouping together jams, jellies, and sauces. Place them in a cool, dark pantry or cupboard for optimal preservation.
When it comes to dehydrated items, store them in airtight containers or jars, organized by type and use. Keep these containers in a dry, cool location away from direct sunlight for easy access to your dehydrated herbs, fruits, or vegetables.
FAQ’s: Storing and Managing Garden Harvest in Your Kitchen
We found that many homeowners have some common questions regarding storing garden harvest in the kitchen. Here are a few answers to commonly asked questions:
At what temperature should you store leafy greens to maintain freshness in your kitchen?
For optimal freshness, store your leafy greens in a dark place in your kitchen with a temperature range of 38-42 degrees Fahrenheit and 90% humidity. This temperature range is ideal for keeping your greens crisp and flavorful.
The humidity level helps to retain moisture and prevent wilting. The refrigerator is one of the best places to store your leafy greens. It provides the necessary cool temperature and helps maintain the required darkness.
Place your leafy greens in a plastic bag to ensure the best storage conditions. This will help to retain the necessary moisture and create an optimal environment that prolongs the shelf life of your greens.
How long do preserved fruits and vegetables last in the kitchen’s freezer?
Preserved fruits and vegetables in your kitchen’s freezer can maintain their quality for an extended period, making them a convenient and flavorful addition to your meals. Generally, frozen produce can last anywhere from 3 to 12 months, depending on the type of produce and the preservation method used.
Freezing effectively stops the decay process, preserving the flavors of your homegrown harvest long after the initial harvest date. To ensure the longevity of your frozen goods, package them properly in airtight containers or sealed bags.
Conclusion
Storing and managing your garden harvest in your kitchen is easy, you just need to follow a systematic six-step process. From swiftly bringing in your fresh produce to inspecting, cleaning, preserving, labeling, and organizing, each step contributes to maintaining the quality and freshness of your harvest.
By categorizing and carefully choosing preservation methods, you ensure a year-round supply of flavorful fruits and vegetables. Organizing systematically in the refrigerator, freezer, or pantry enhances accessibility, making meal planning a breeze.
Enjoy the fruits of your labor throughout the year, knowing that your well-organized kitchen is stocked with the best garden harvest.